A homeowner spent years replacing flashing and the roof for a chimney leak, but the real cause was small. Expert diagnosis beats guesswork.
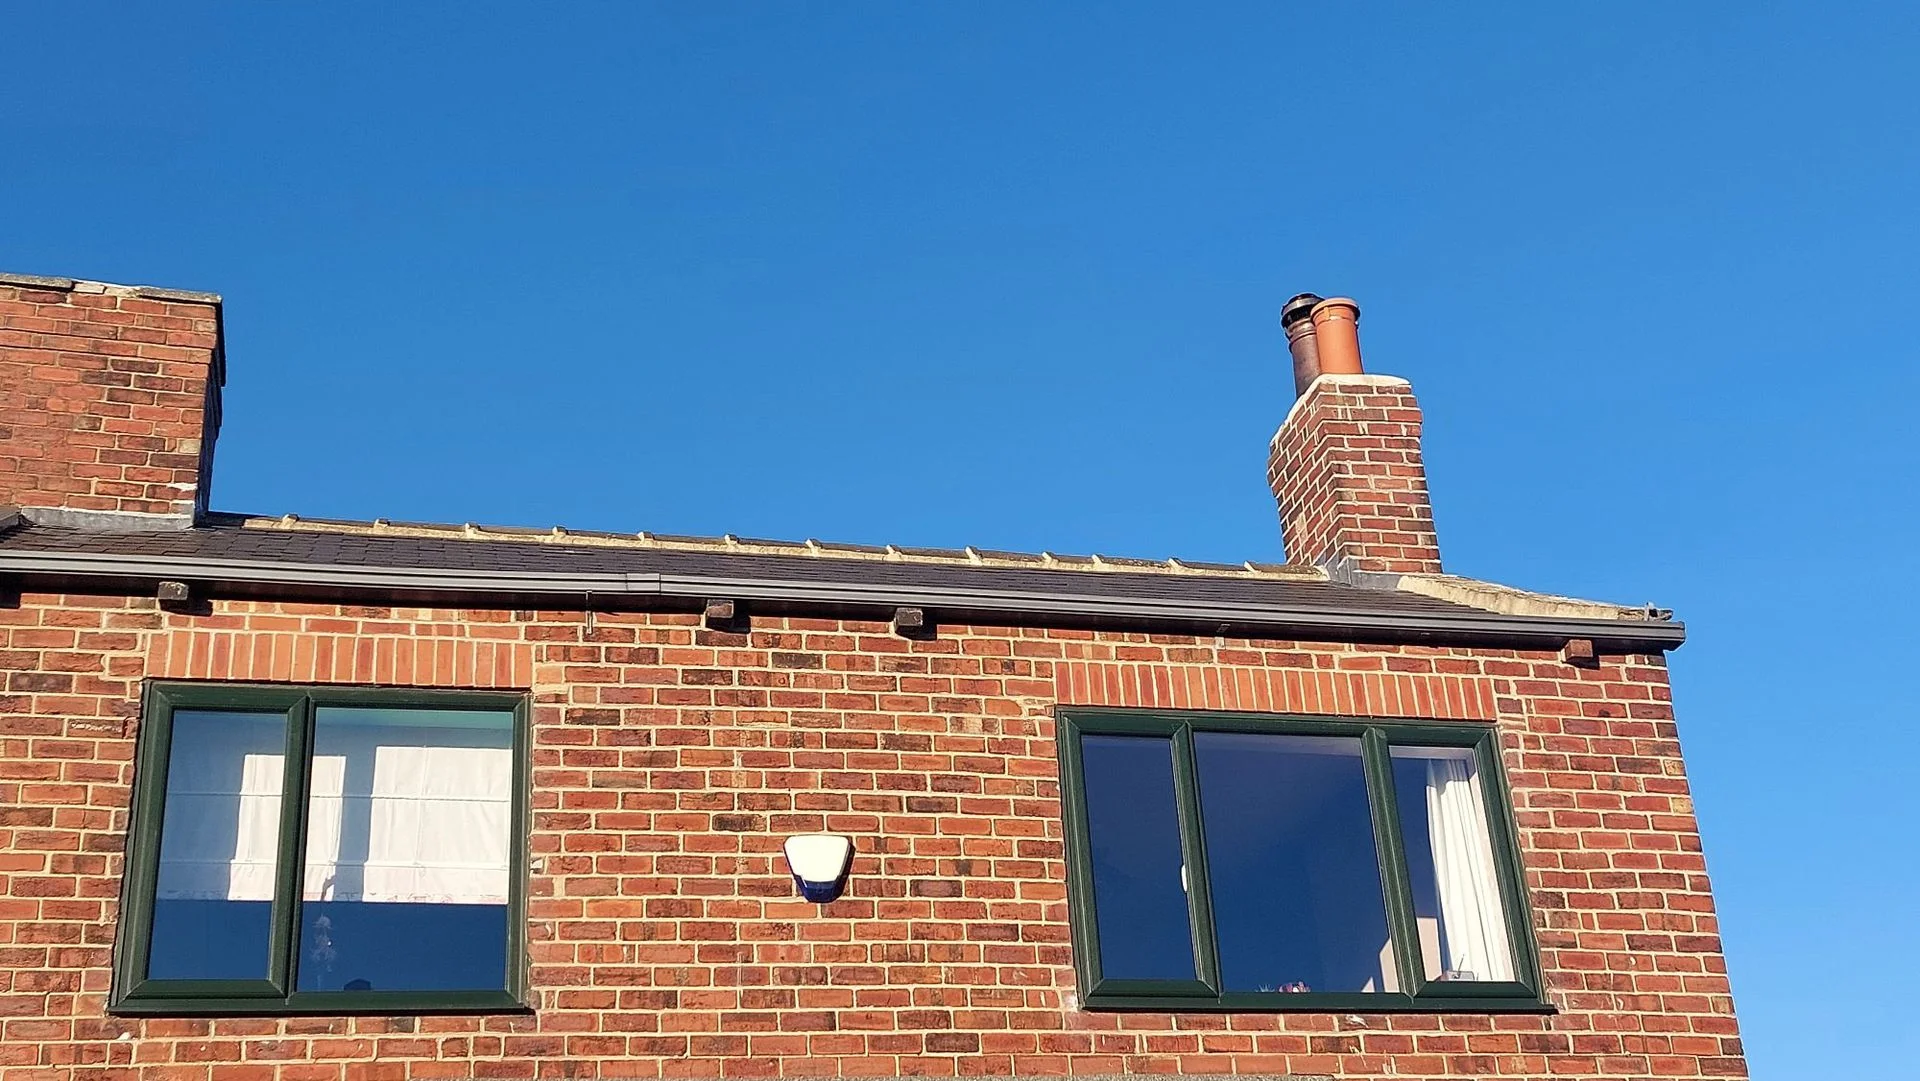
For seven years, Alice woke up to the same damp patch on the chimney breast opposite her bed. Every repair she paid for left the leak in place, and the bill kept climbing. The lesson she takes from it isn't about chimneys in particular. The problem looked huge, so she kept buying big fixes, and the cause turned out to be small.
The leak that showed up on day one
The leak announced itself on the first visit after collecting the keys. Trails of water ran down the Artex on the bedroom chimney breast, and the Artex was plastered over soon after. Failed lead flashing is one of the most common causes of chimney leaks, so Alice paid to have the flashing replaced. That was the obvious move, and it was wrong.
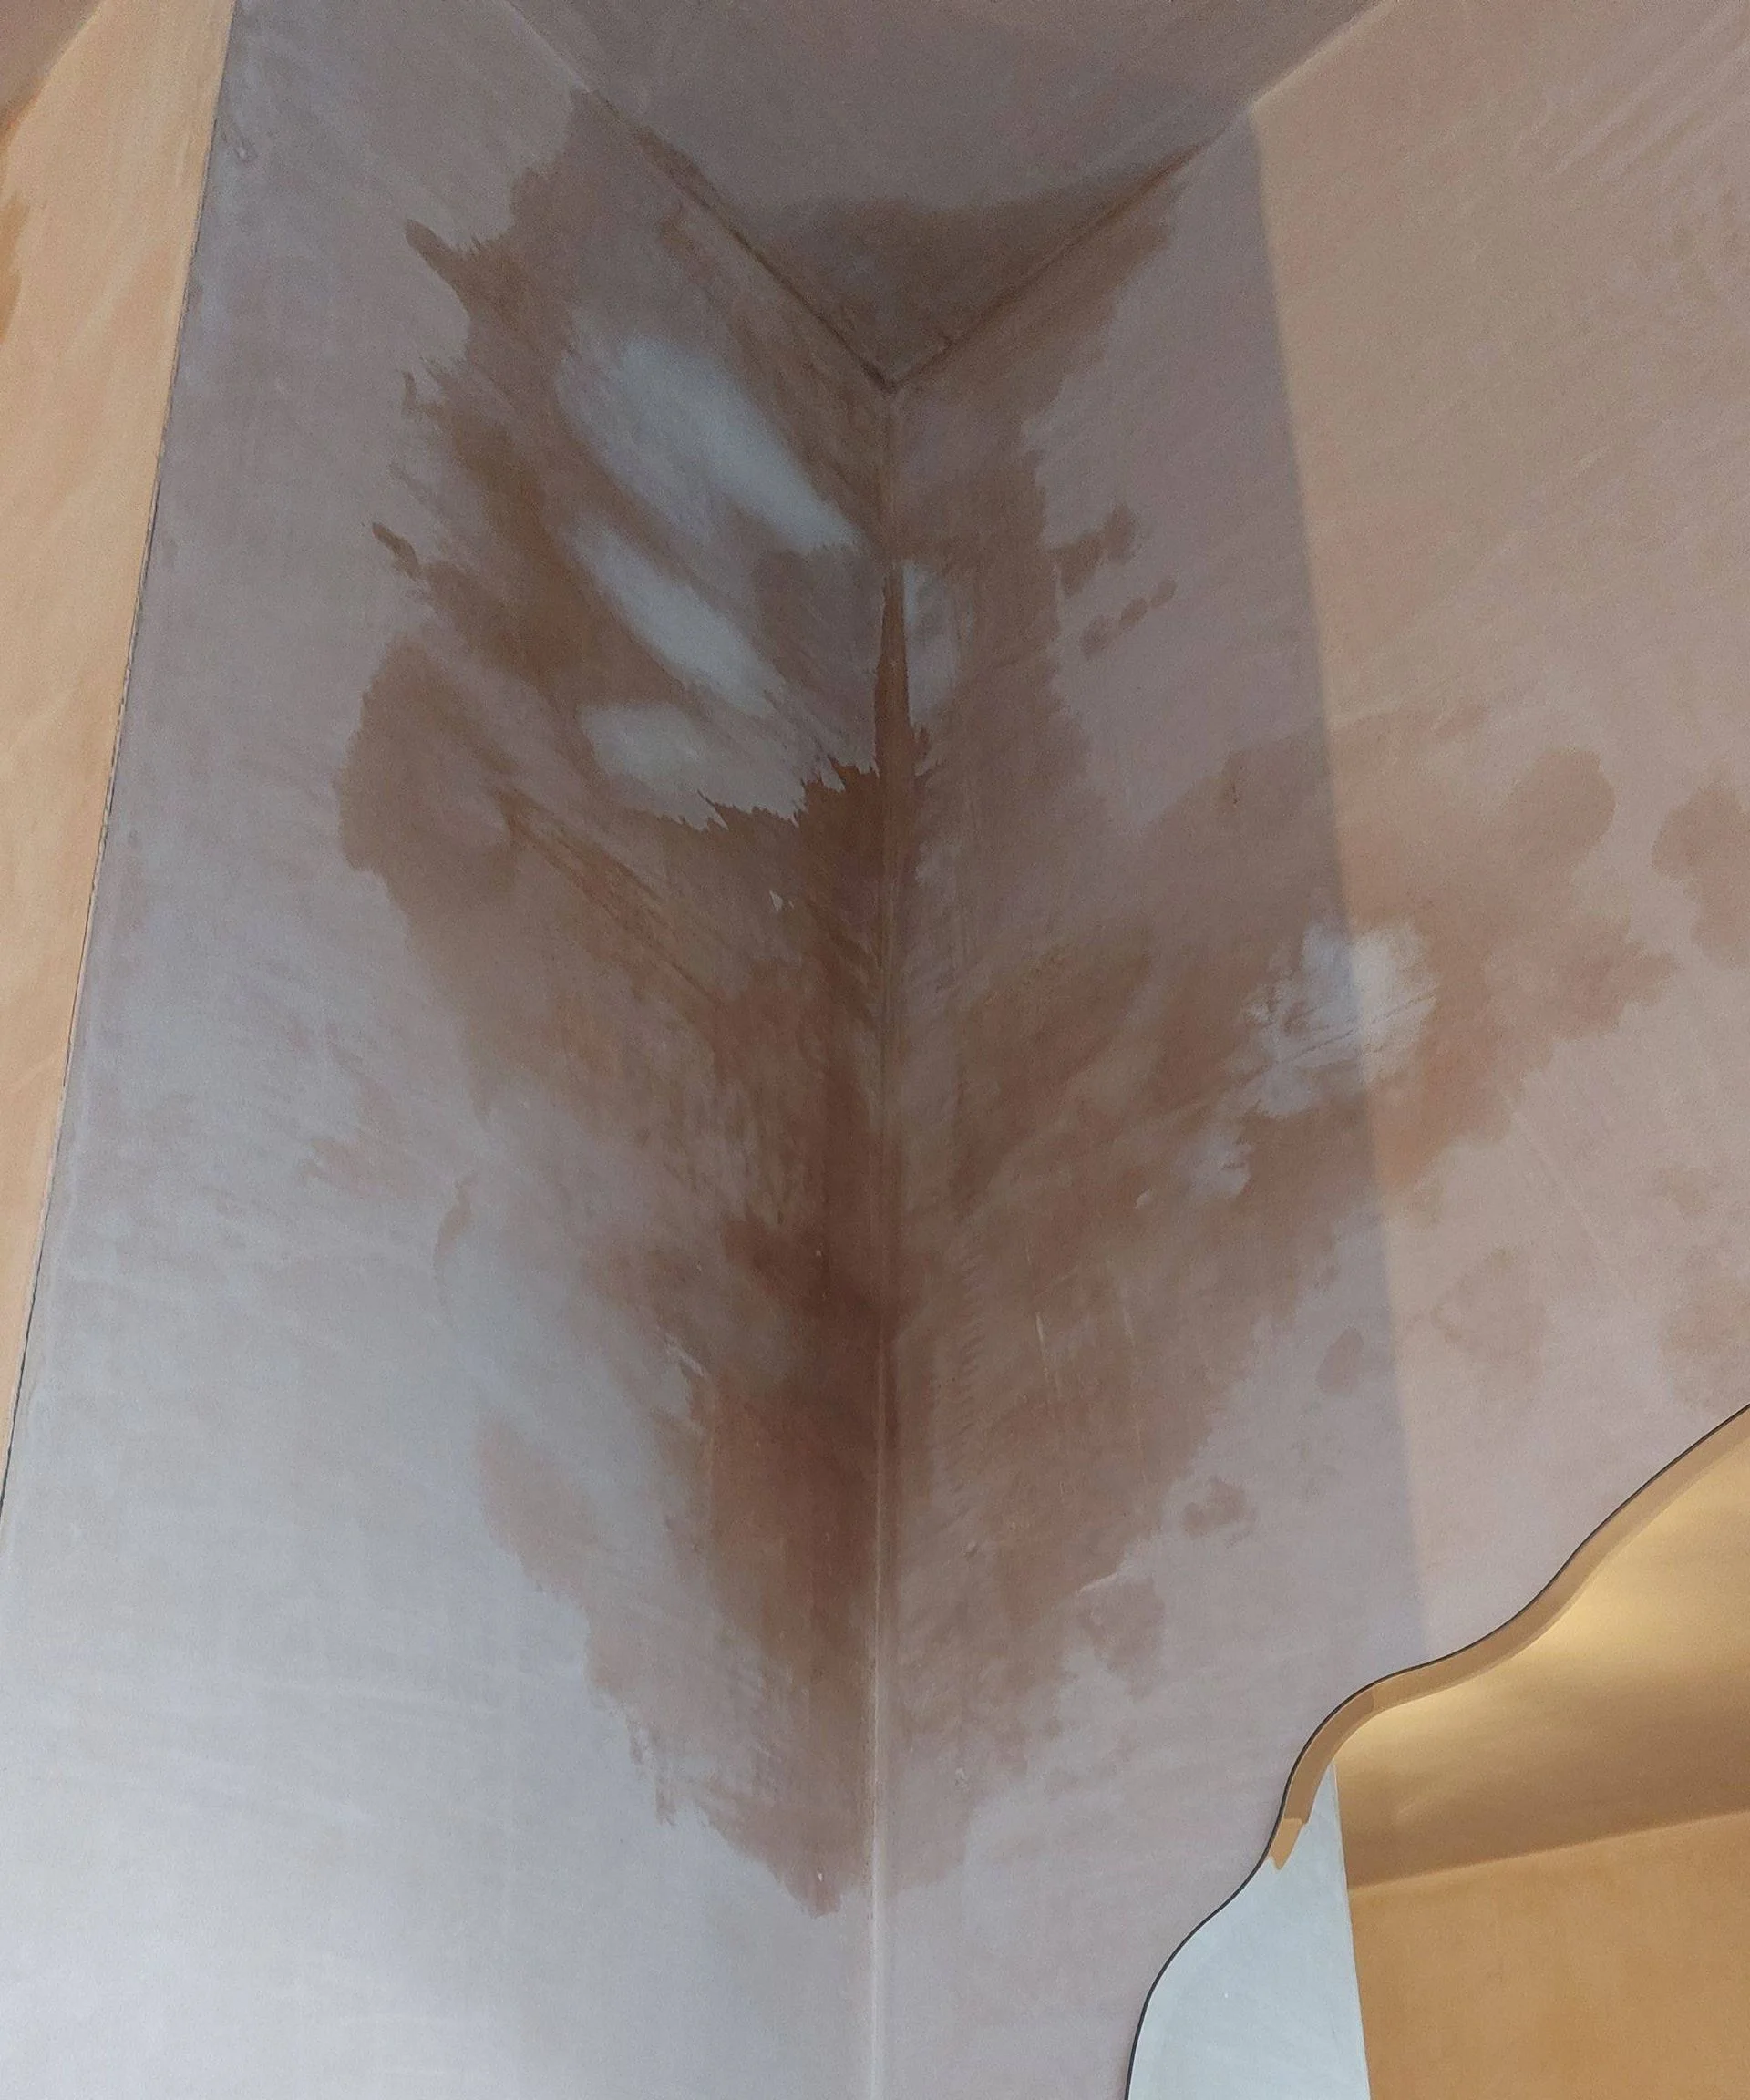
A few months after moving in, a damp patch appeared in the bedroom, which had been replastered during the house renovations. It sat where the chimney breast met the ceiling, on the side of the active flue. By then Alice had realised her roof wasn't in great condition. Because the damp showed on the ceiling, she assumed the roof was responsible and hired a different roofer, who replaced several broken slates.
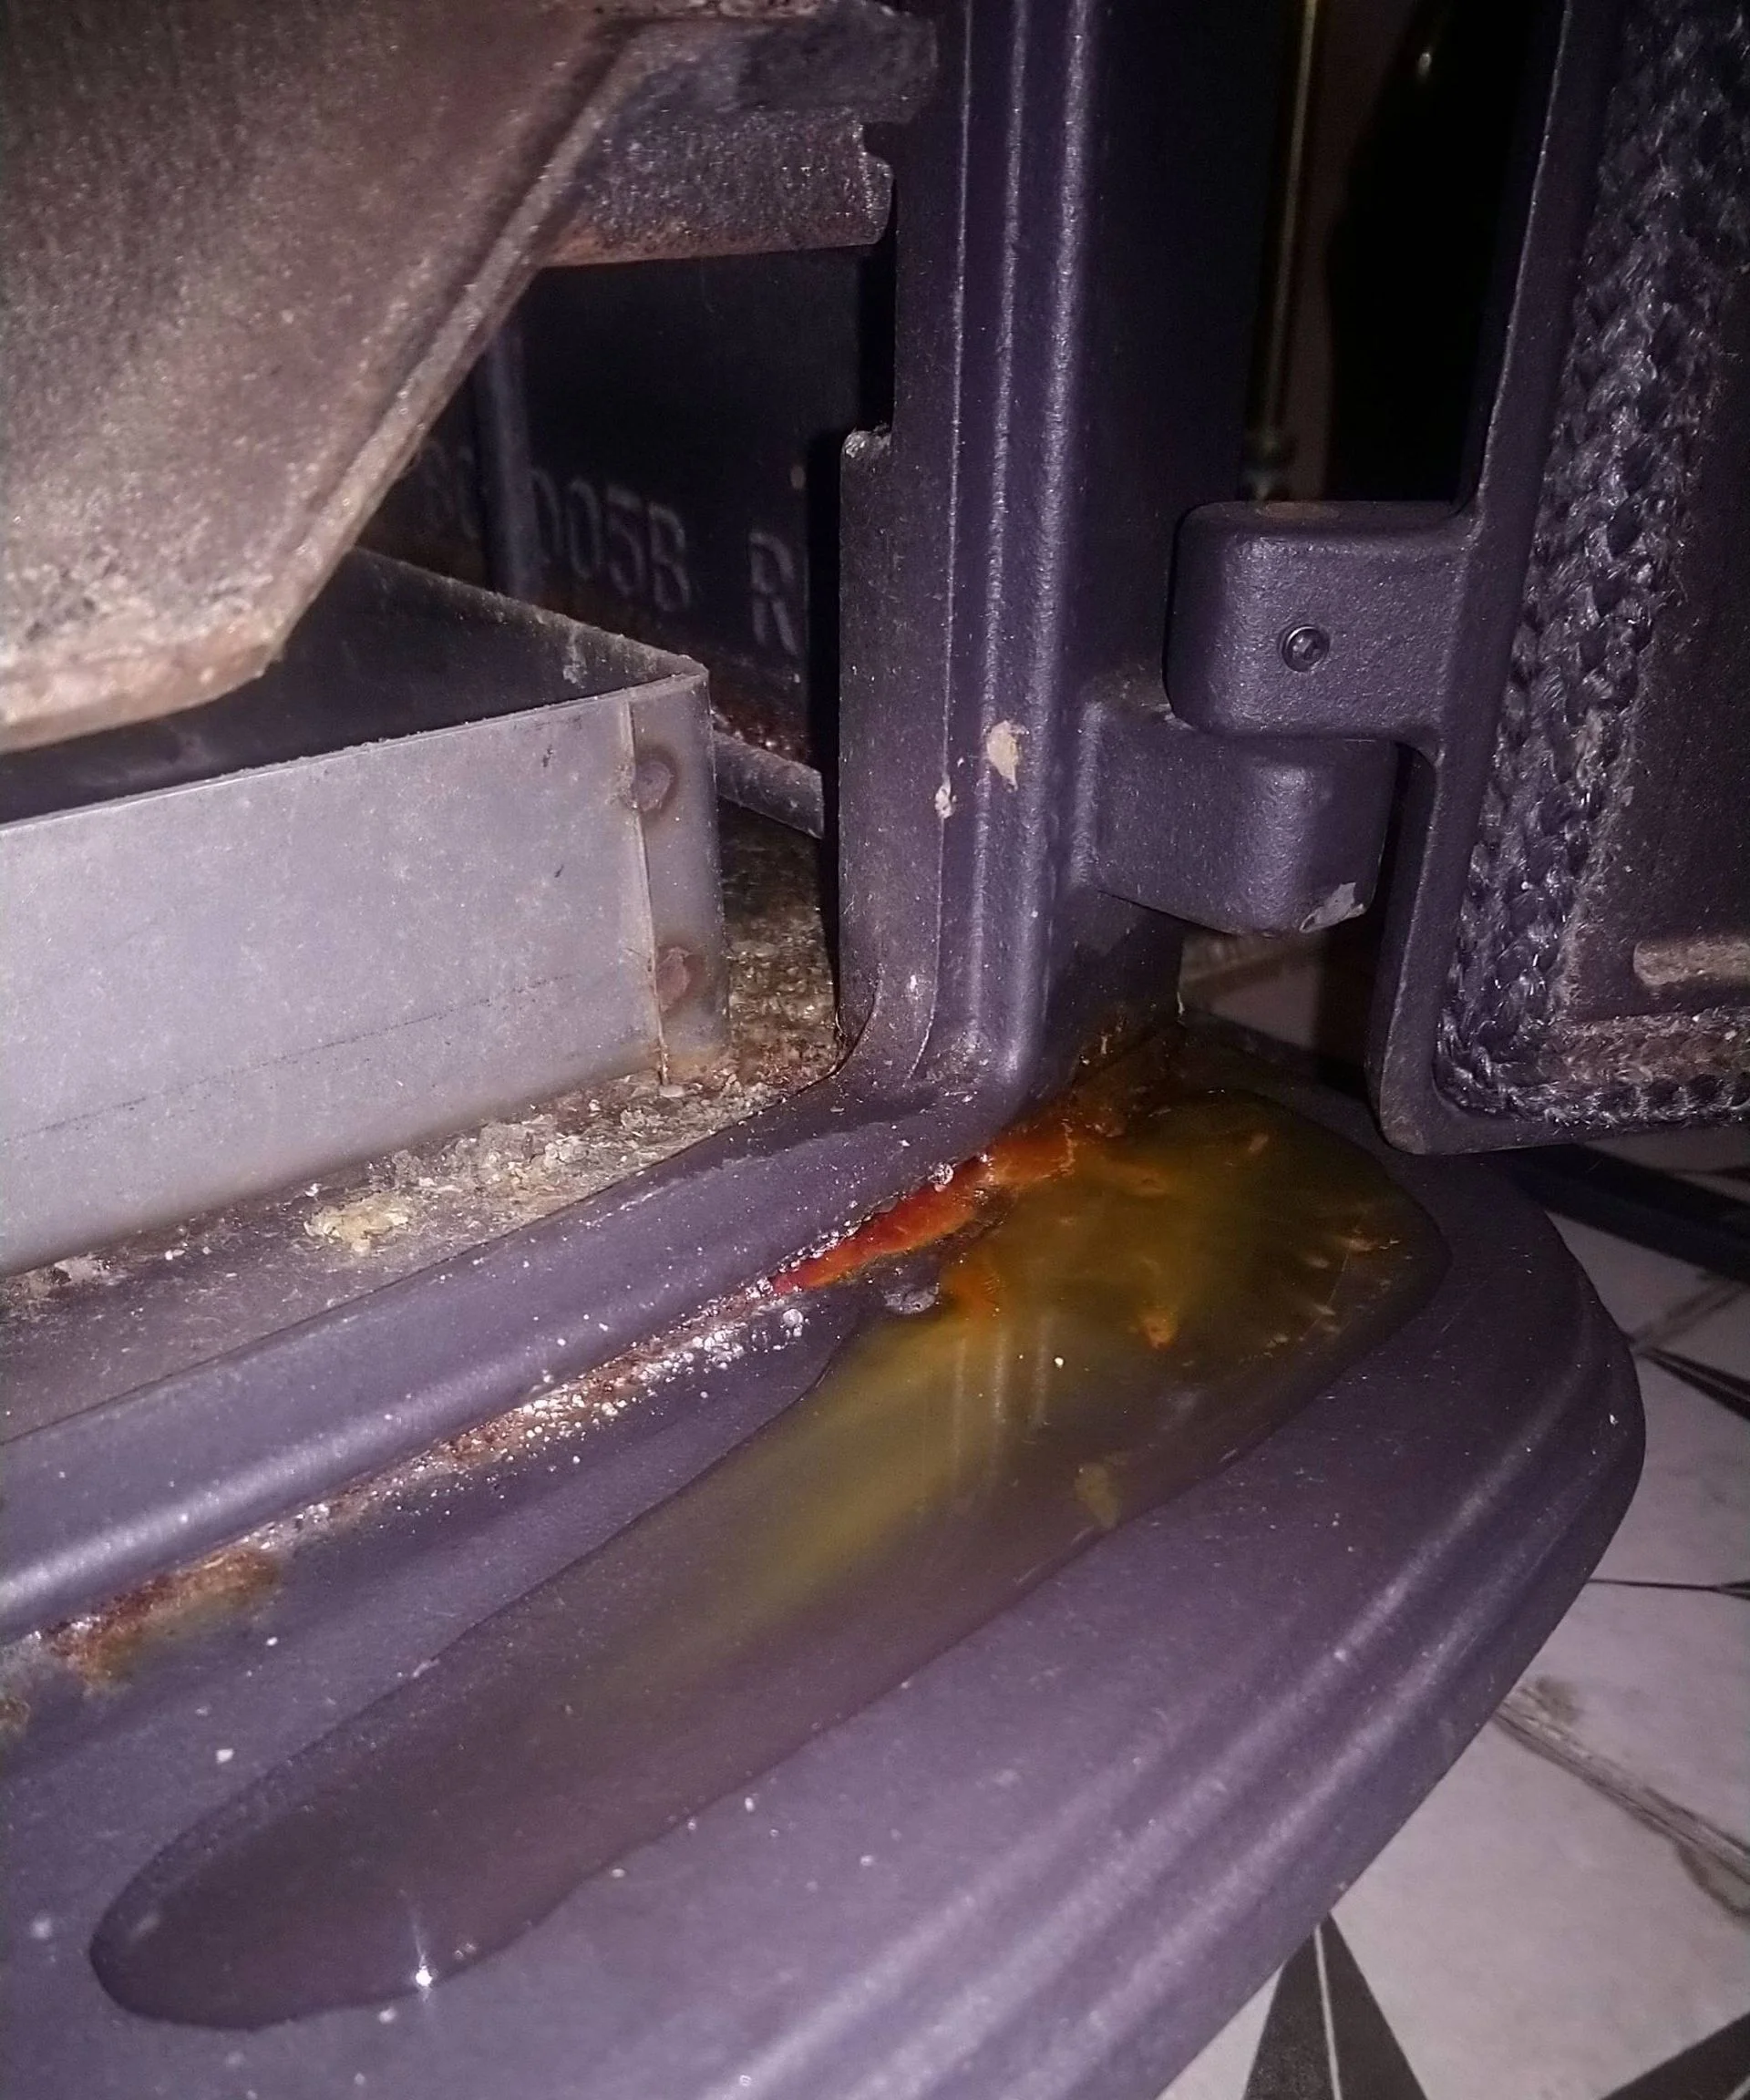
Then came the first winter, which exposed everything. Heavy rain made water pour out of the unused rear flue outlet on the log burner and spread across the hearth. The log burner installer blamed the cowl and fitted a more weather-proof one. Meanwhile the bedroom damp kept climbing, from ceiling level to halfway down the wall. Small damp patches also appeared around the ceiling edges, where the roof met the exterior walls.
Here's the thing: the roof looked like the culprit because it was the most visible suspect. Every tradesperson who walked past had an opinion about it. Alice found a reputable roofer and paid for full roof replacement, and the leaks carried on regardless.
Damp problems also make themselves hard to track. The leak only appeared in winter or during wet spells, so it was almost impossible to judge how bad it was, or whether a fix had worked, without waiting months to find out.
Top tip: Don't build your diagnosis on a few hours of searching online, and don't take advice from tradespeople who aren't experts in the specific problem you have.
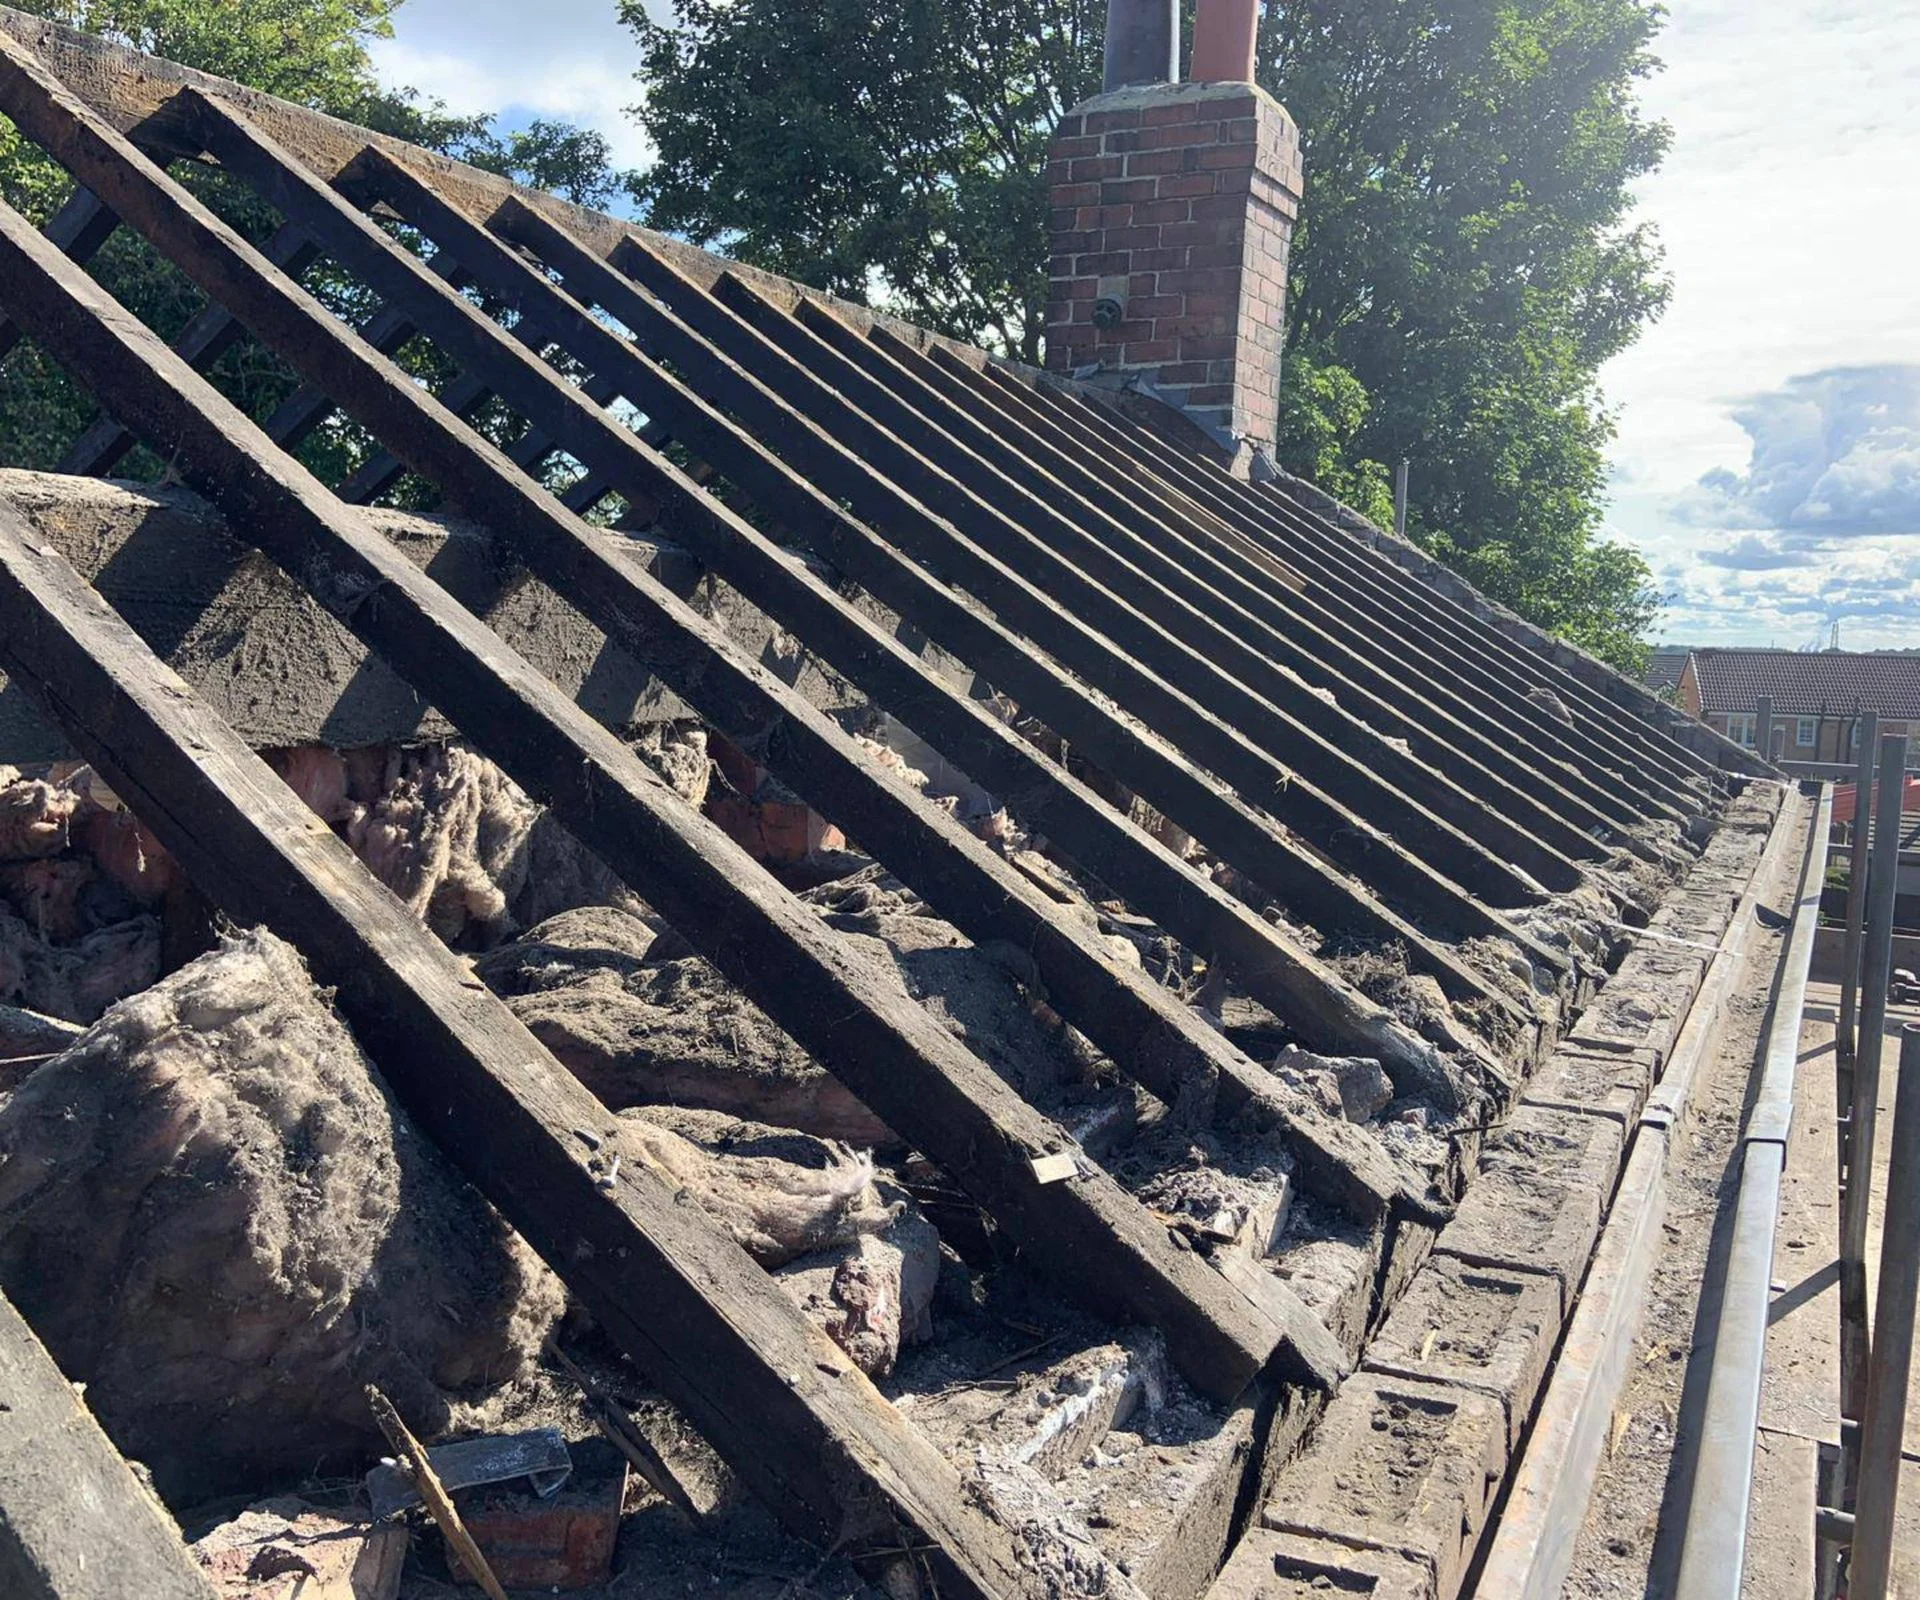
The new roof didn't stop the water
Alice went into another winter with the new slate roof and no idea what was still happening inside. During downpours, water pooled in the bottom of the log burner and seeped out through the body and the rear flue outlet into the fireplace. On several occasions she mopped up a litre of water from the ashpan.
Email exchanges with the installer revealed that the chimney pot on the active flue was larger than average. Alice agreed to a different cowl and approved sealant between the pot and the cowl to keep rain from getting in between them. She had lost faith in the installer by then, so she complained to HETAS. The body put the problem down to condensation.
Alice wasn't buying it. The log burner and bedroom damp always flared up in heavy rain, which pointed away from condensation. She had her trusted roofer renovate the whole chimney stack. The stack was repointed and sealed with Thompson's Water Seal, the flaunching was replaced, and the redundant flue got a new pepper pot cap to improve ventilation.
The bedroom damp seemed to settle after that. The log burner still leaked in heavy rain, though less severely. Alice decided she'd run out of options, accepted that this was as good as it would get, and resolved to light the fire more often to keep things dry.
The cost of all that guesswork showed up in the house. The bedroom ceiling was crumbling, the plaster on the chimney breast needed replacing, and the log burner body had started to corrode.
What finally forced a proper fix was the record-breaking rainfall of January 2026. A large new damp patch appeared on the inactive side of the bedroom chimney breast and spread onto the gable end wall. It also drew salts out of the brickwork.
Top tip: Don't mark a problem as fixed just because you're worn out by it. There are almost always more avenues to try.
An independent expert found the real fault
By this point Alice had spent £8,800 and still didn't know the cause. She posted a plea for help on her renovation social media channels, and that led her to a heritage surveyor, someone who specialises in traditionally built houses. She booked through Expertible, an advice service set up by a fellow renovator. The appeal, for Alice, was that the people behind it understood why trustworthy advice matters, and they didn't earn money by selling the work.
The consultation was a 45-minute video call, and Alice had to send as much information as she could beforehand. It cost £145 and flagged three likely problem areas:
- Insufficient ventilation. The surveyor didn't think condensation was behind the problem, but said best practice is to ventilate an unused flue at both the top and the bottom. Moisture trapped in a redundant flue can migrate into the active flue and soak through the plaster.
- A poor-quality cowl. The surveyor suspected the cowl was a cheap model, probably bought online. This type of cowl often lets wind-driven rain through the bird guard and down the flue liner. He recommended a more specialist cowl that greatly reduces rain ingress.
- A fault in the chimney stack. After reviewing photos, the surveyor judged the lead flashing to match the rolled lead guidance from the Lead Sheet Training Academy, which cleared it. He pointed instead to the flaunching or the condition of the pointing.
Top tip: If a problem drags on for a long time, get independent advice. An expert with no stake in the outcome is the best defence against conflicts of interest.
The fix, and what it actually cost
With the surveyor's findings in hand, Alice hired scaffolding to reach the chimney stack safely. Up close she found several cracks of different sizes in the flaunching. The stack pointing was still in good shape, but the mortar between the gable end brickwork was crumbling, cracked and missing. That gap let rain run straight into the chimney breast below the roofline. It explained every damp patch in the bedroom.
Alice had picked up some building skills from her grandad, who was a builder. She brought in her dad, a chartered engineer and experienced renovator, to help with the work.
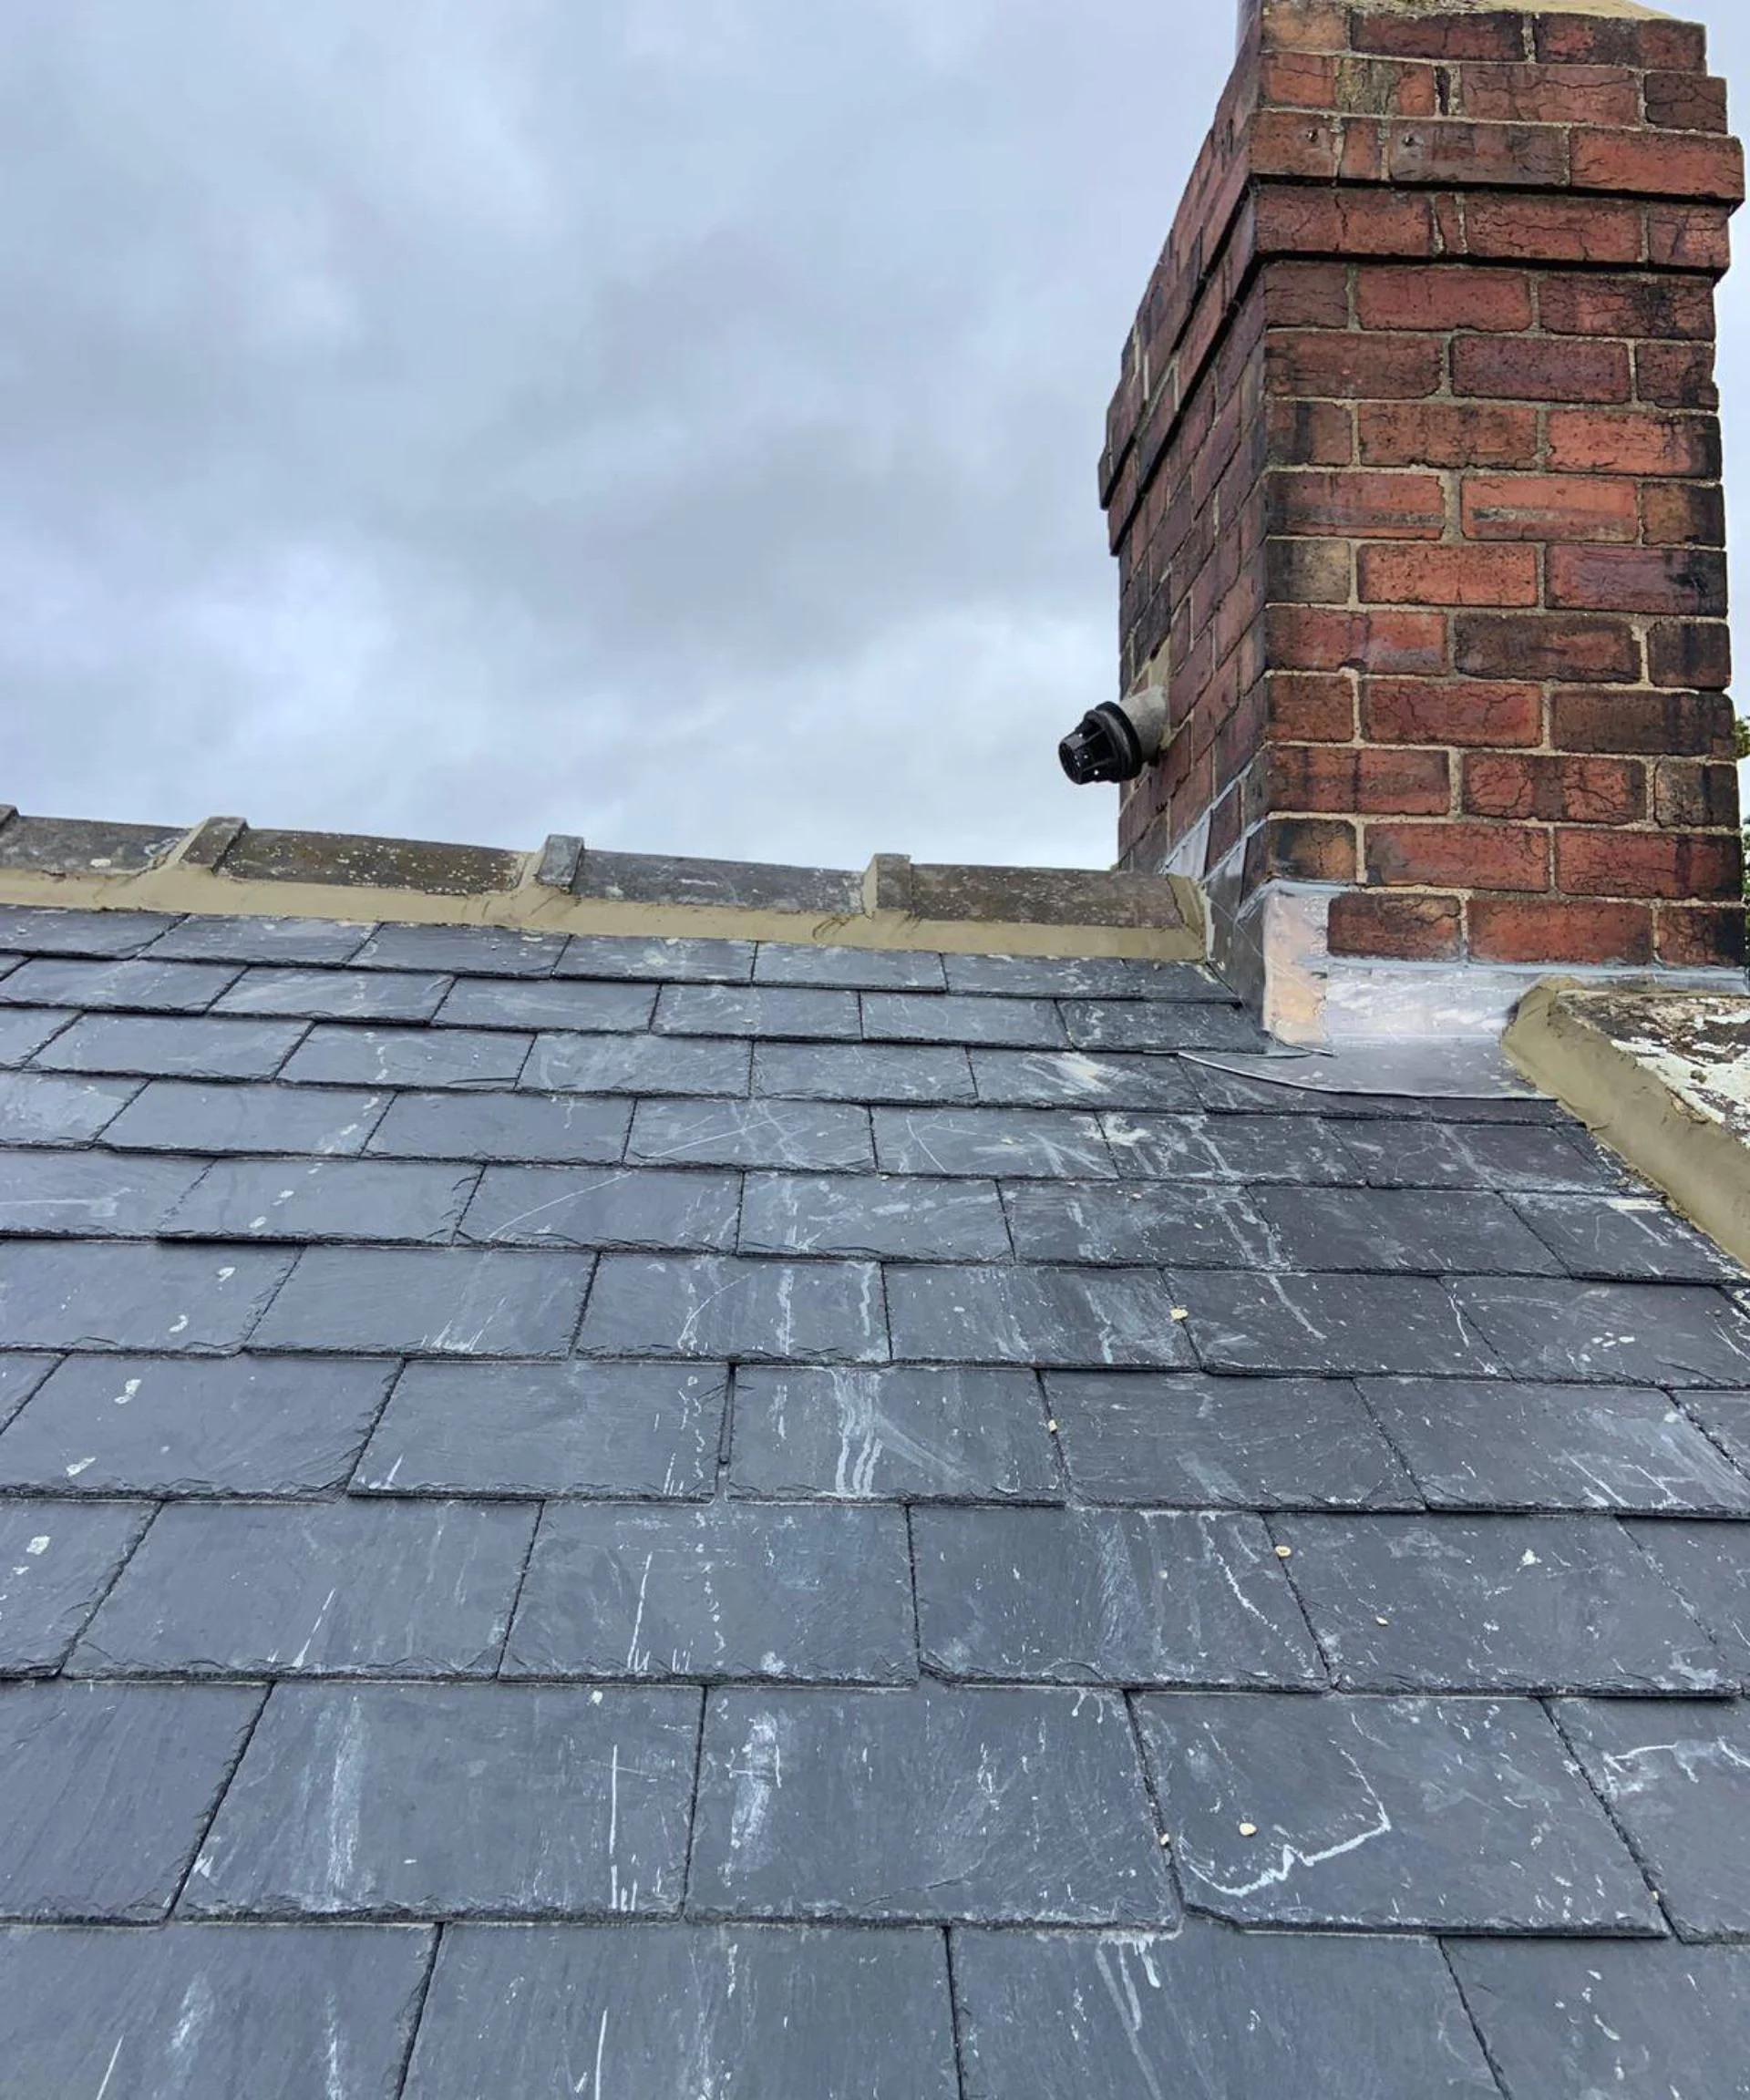
The flaunching came first. Alice ground each crack slightly wider with an angle grinder fitted with a diamond blade. Once the cracks were clear of debris, she filled them with a fire-resistant sealant that stays flexible and can absorb minor movement later. The sealant cost £9.19, and the grinder blade was about £23.
The cowl was the easy part. She ordered the model the surveyor had recommended, the Brewer Ultimate Flue Outlet Round Multifuel Chimney Cowl from Roof Giant, which suits an oversized pot and has a stronger weatherproof design. Alice cut away the old sealant with a Stanley knife, removed the old cowl from the flue liner, fitted the new one, and secured it to the pot with the stainless-steel strap supplied. Delivery included, the cowl cost £61.76.
Next was the gable end pointing. Alice ground out the damaged mortar with an angle grinder, then repointed the brickwork with a pointing trowel and a bag of Blue Circle Quality Assured Mortar from B&Q. She already owned the trowels, so the mortar mix cost £12.90 and the tub for mixing with water cost £8.24. Total spend on the pointing was low, which is part of the point. The fix that stopped the leak was a few pounds of materials and a weekend of labour.
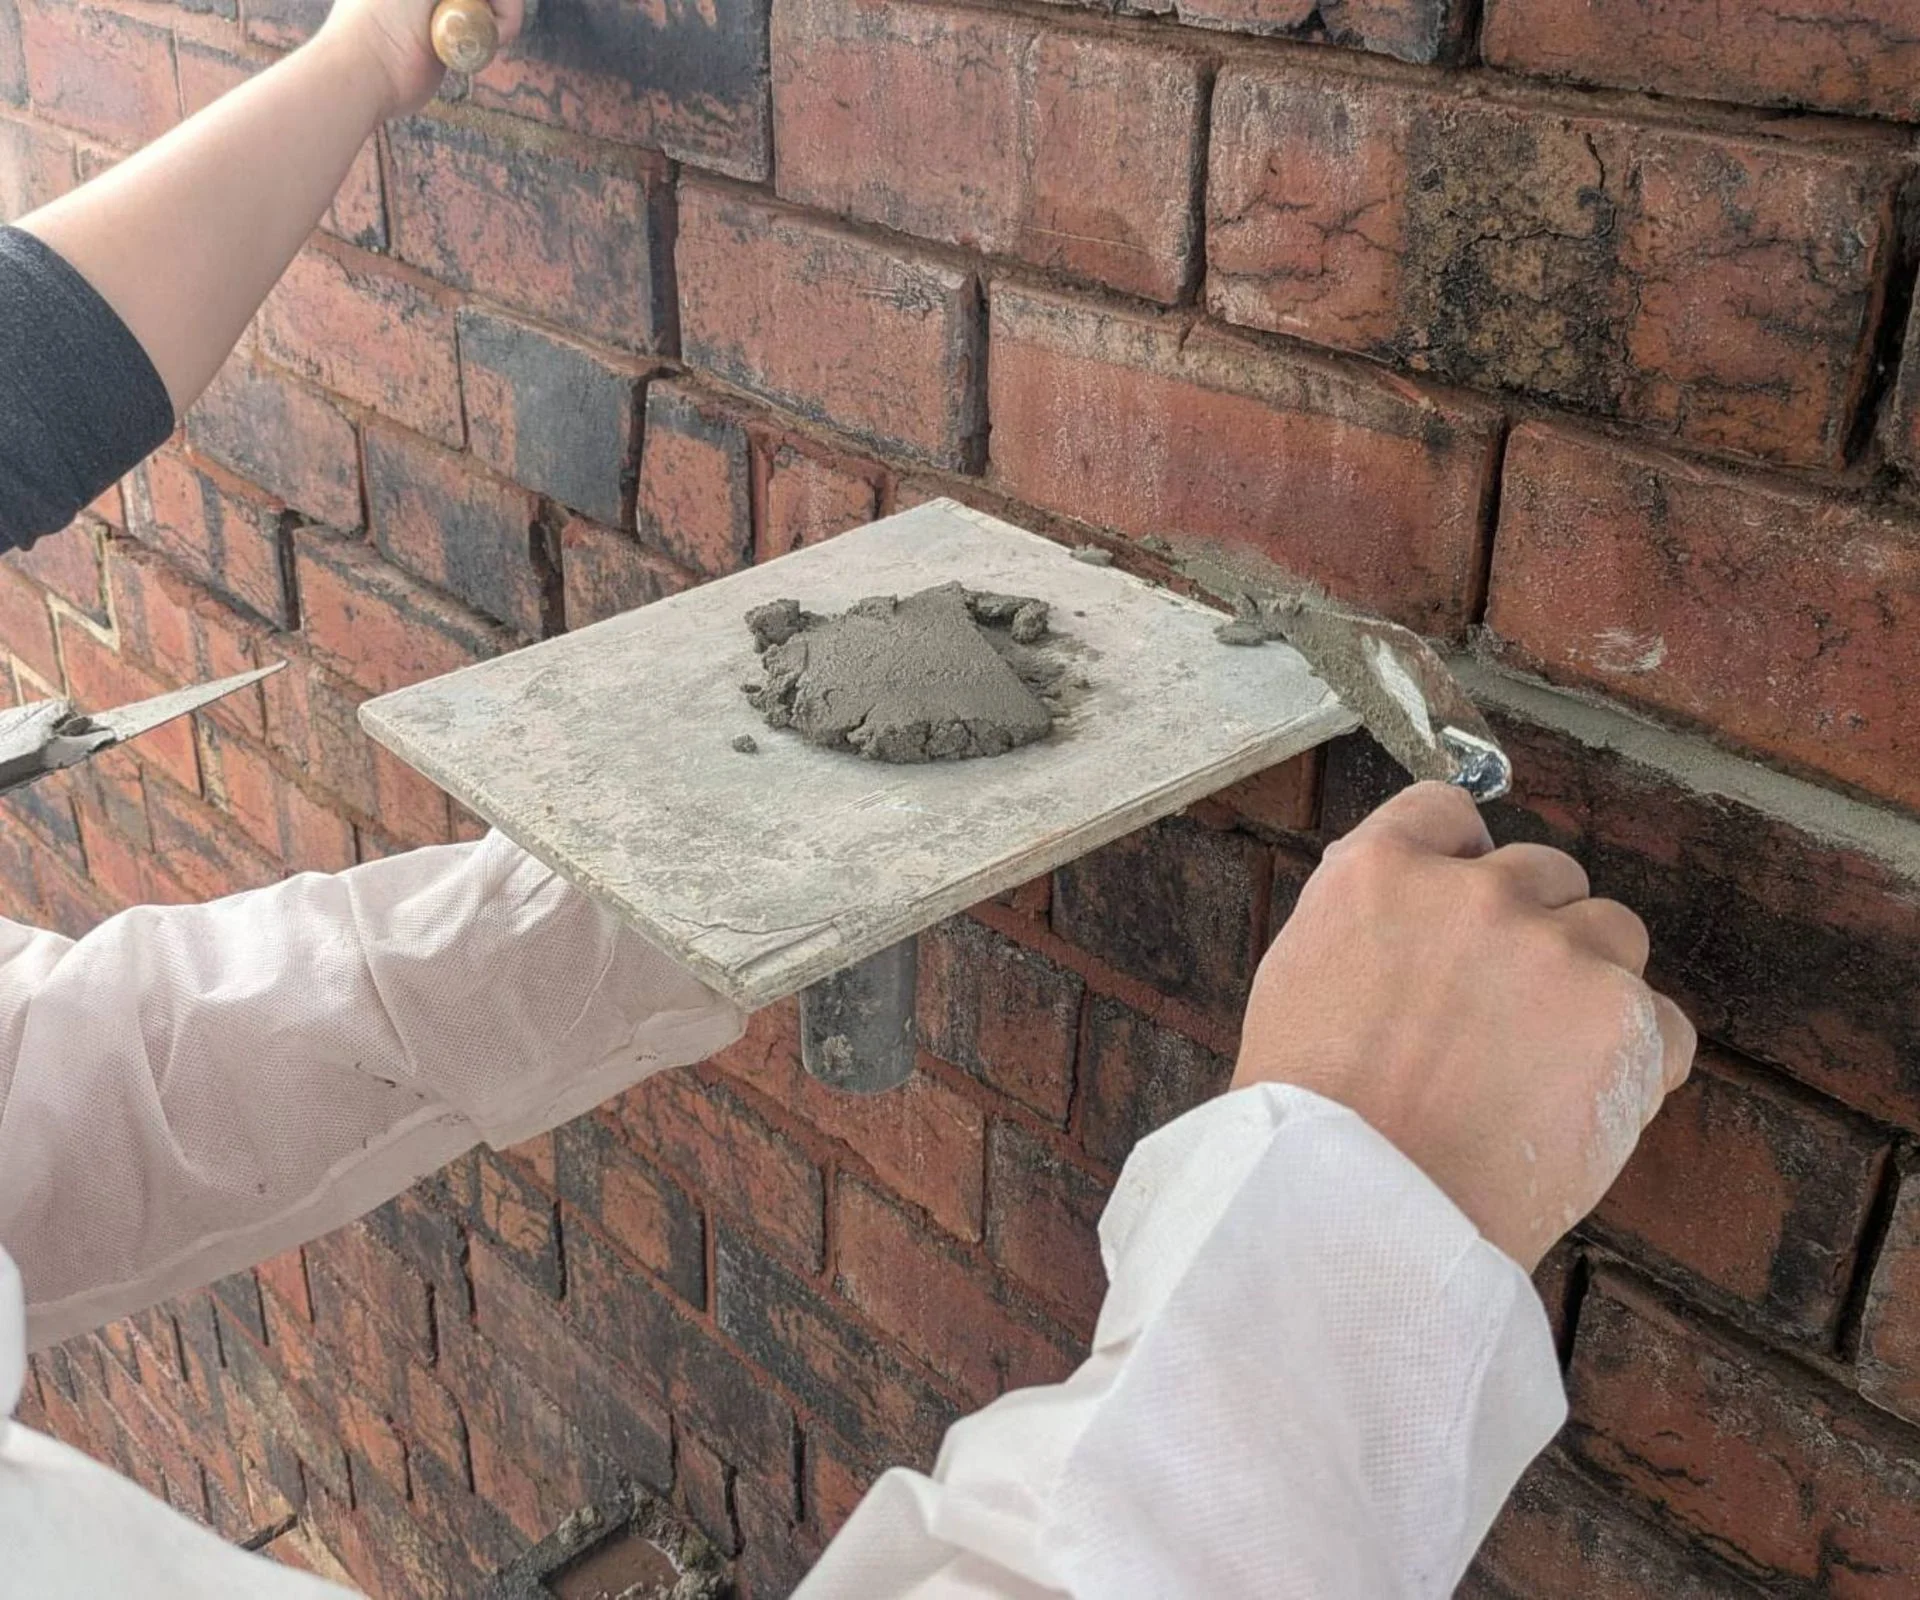
Products Alice used on the chimney

A black silicone for non-porous surfaces that withstands heat up to 300°C.

A cordless grinder with a three-point handle for control and a blade guard against sparks.

A range of trowel sizes, well suited to repointing work.
Six months on
Six months after the repairs, the external work is done and the results look solid. The log burner hasn't shown a single drop of moisture since, and the bedroom damp appears to have dried out. Alice's repair list is still open, though. She plans to add ventilation to the unused bedroom flue, have the damaged plaster fixed, and bring the rusty log burner back with wire wool and stove blacking.
Her advice to anyone stuck with a chimney problem is blunt. How alarming a fault looks tells you very little about how much it will cost to fix. Alice assumed she had a major structural defect, and she spent heavily on work that improved the house without touching the cause. If she had looked for the simpler explanation earlier, she'd have saved herself years of worry and a lot of water damage.



Discussion
Sign in to join the discussion.