A 50cm drop beside new bifold doors kept a family's garden out of use. A floating Trex composite deck solved it without raising the old patio.
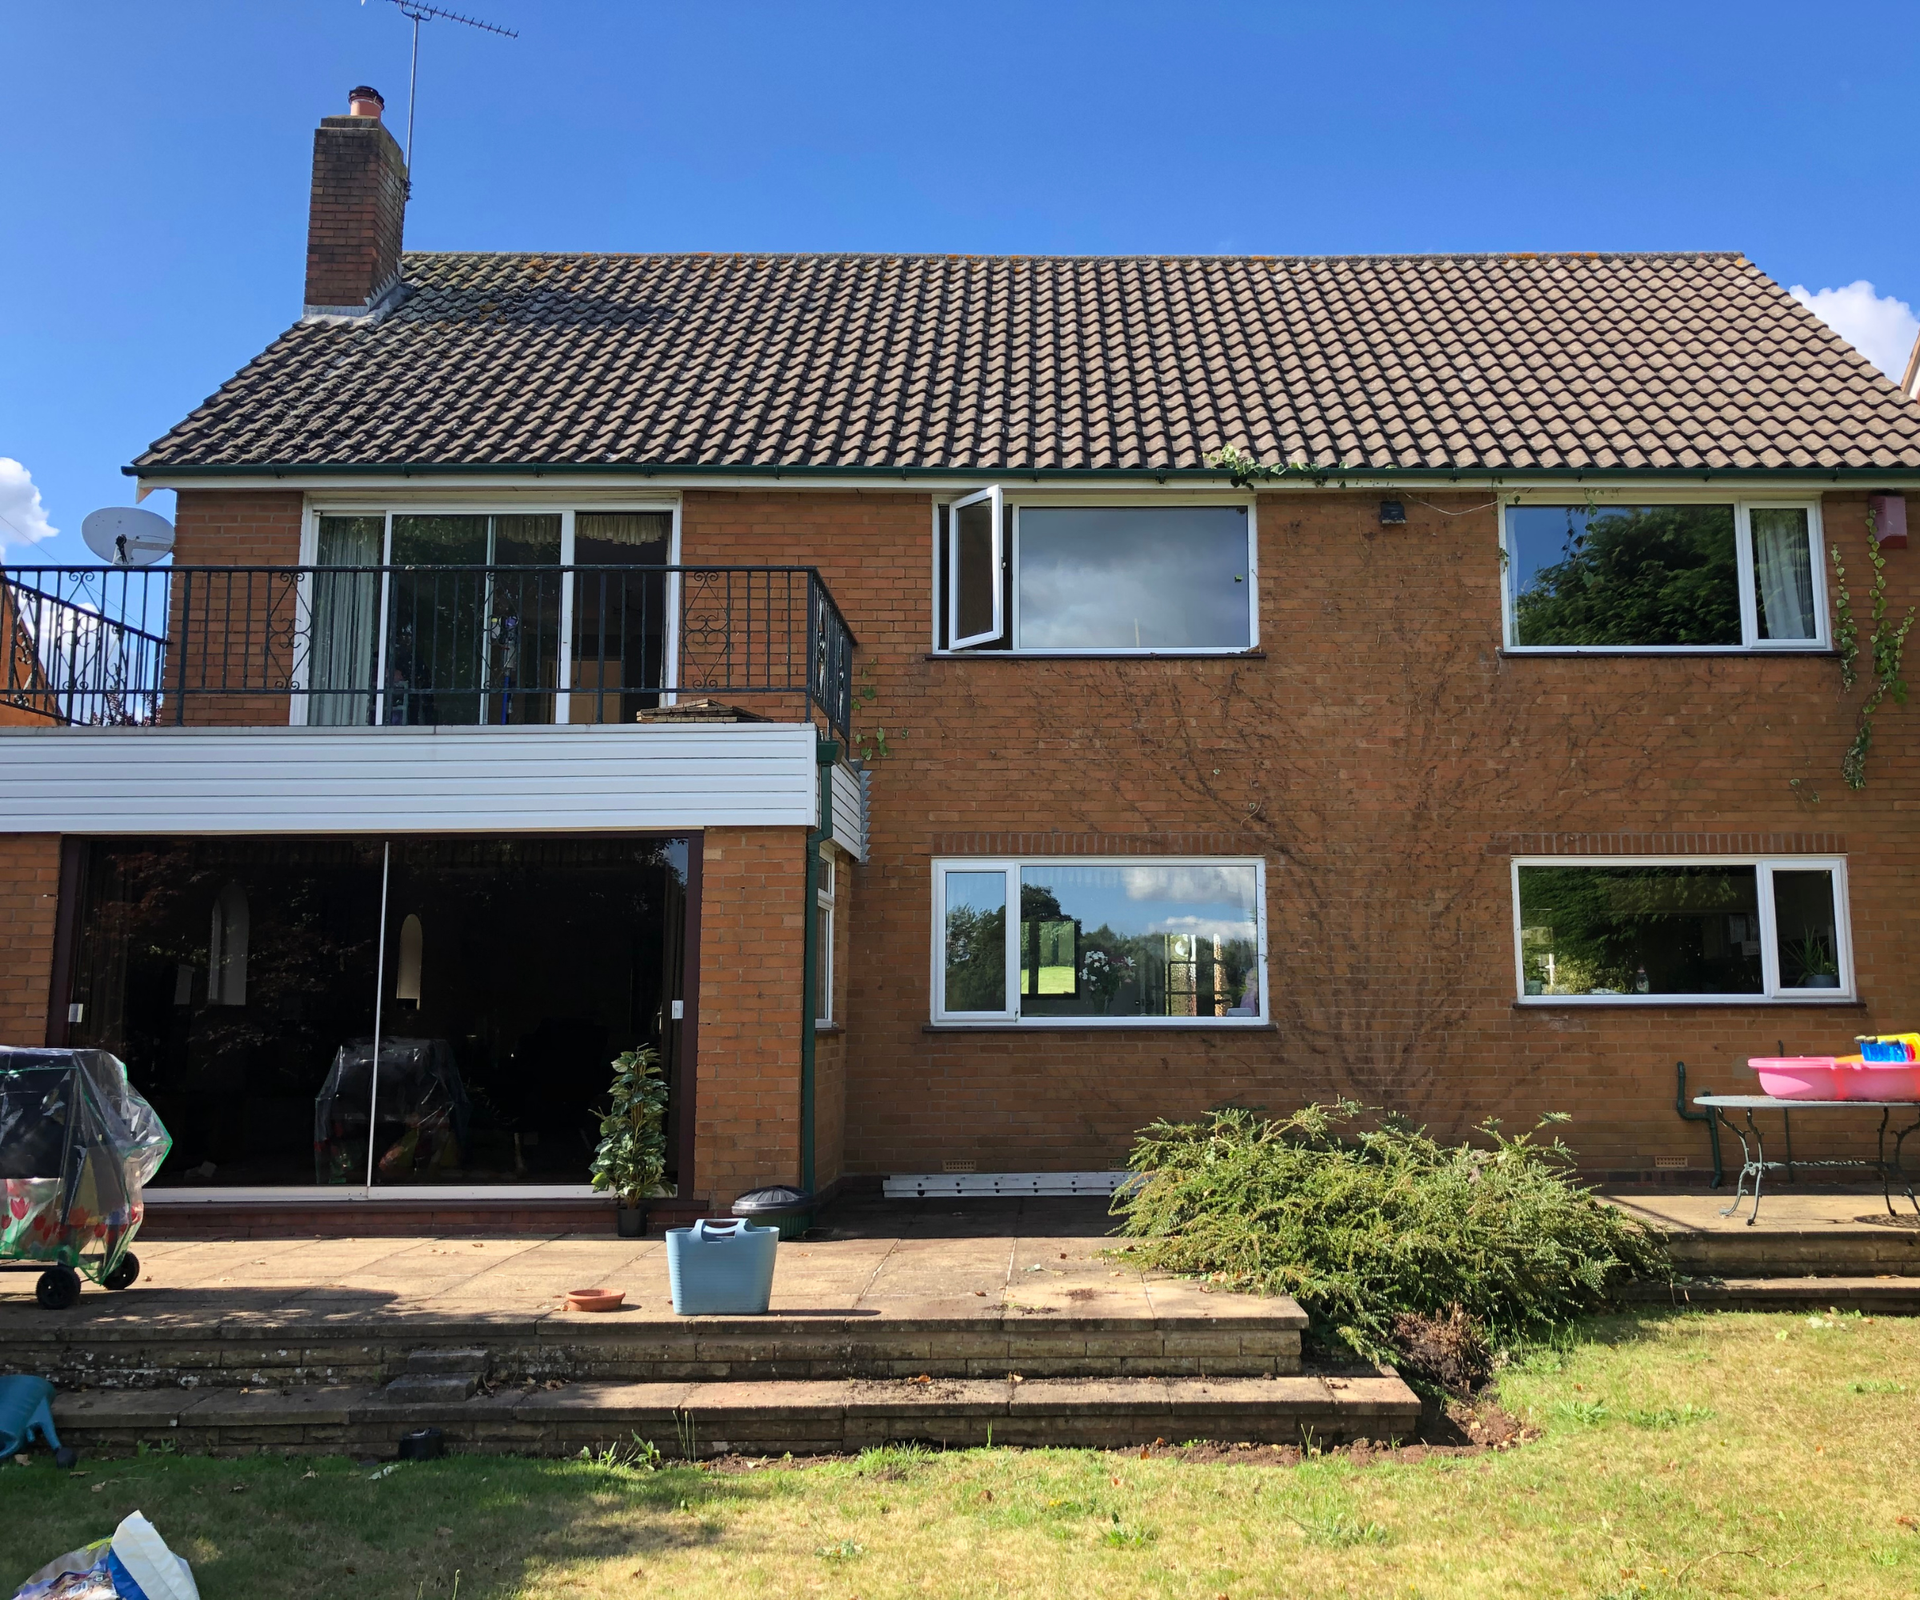
New bifold doors promise easy indoor-outdoor living. They deliver it only if the ground outside is level with the threshold. For one household, the doors had gone in during a full interior renovation and then stayed mostly closed, because the drop to the uneven concrete patio sat at 50cm. A two-year-old took a tumble down it, and that was the end of the bifolds as a daily route into the garden. The fix turned out to be a floating composite deck, and it's a useful model for anyone facing the same mismatch between a new door and an old patio.
Why a floating deck made sense
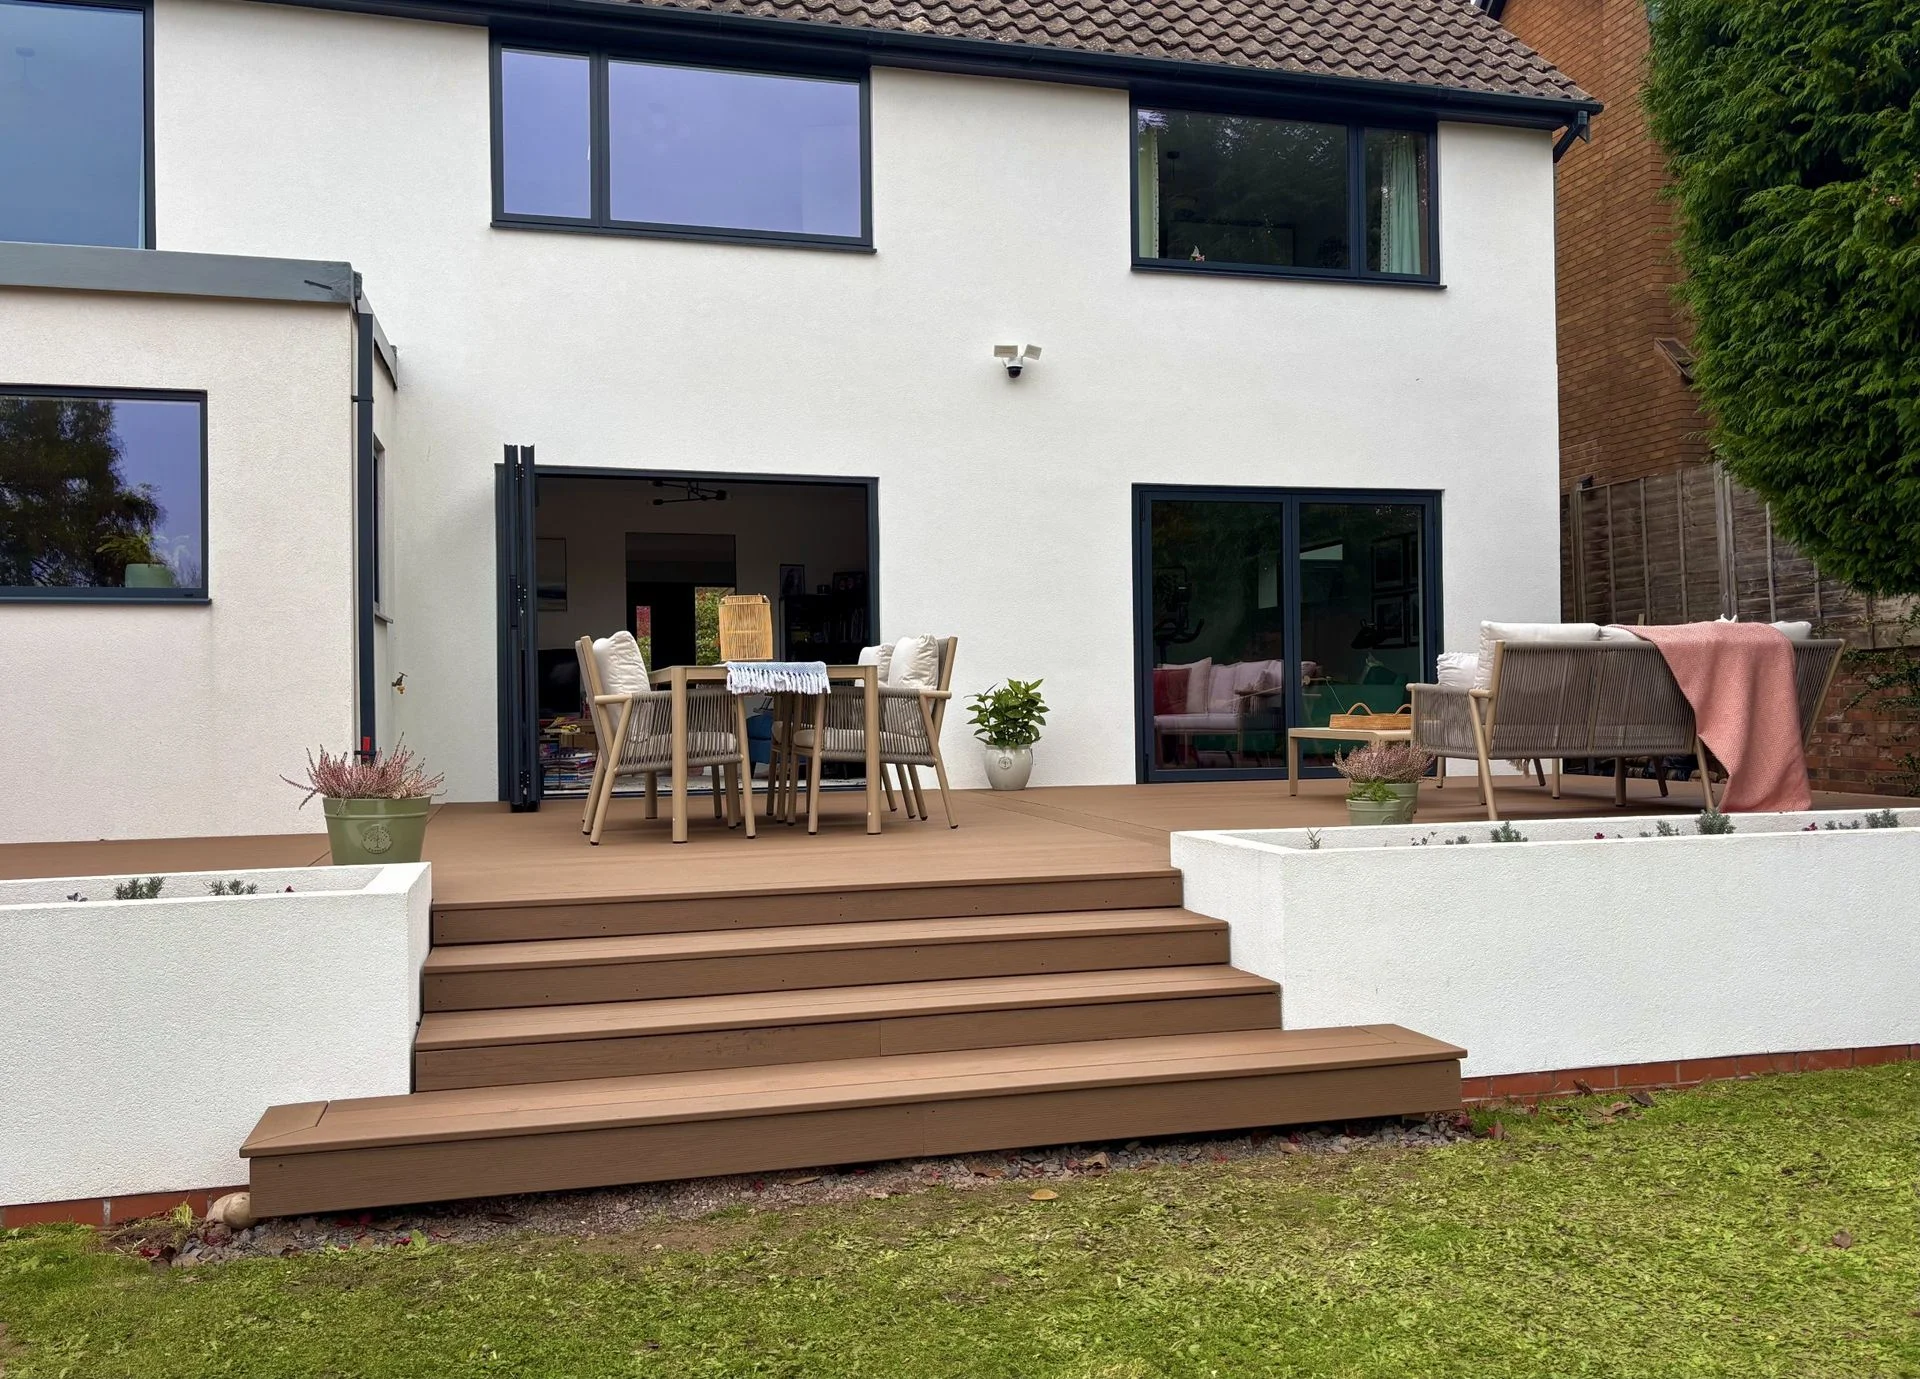
Lifting the old patio to door height looked like the obvious answer, and it was also the most expensive one. Instead, the deck is suspended between the back of the house and two raised planters. Much of its weight rests on a timber frame built directly on top of the existing patio, so the original concrete doesn't need to come out. The result is a level threshold and a clear step-down path to the lawn, which is exactly what the drop had been missing.
1. Digging out to create raised beds
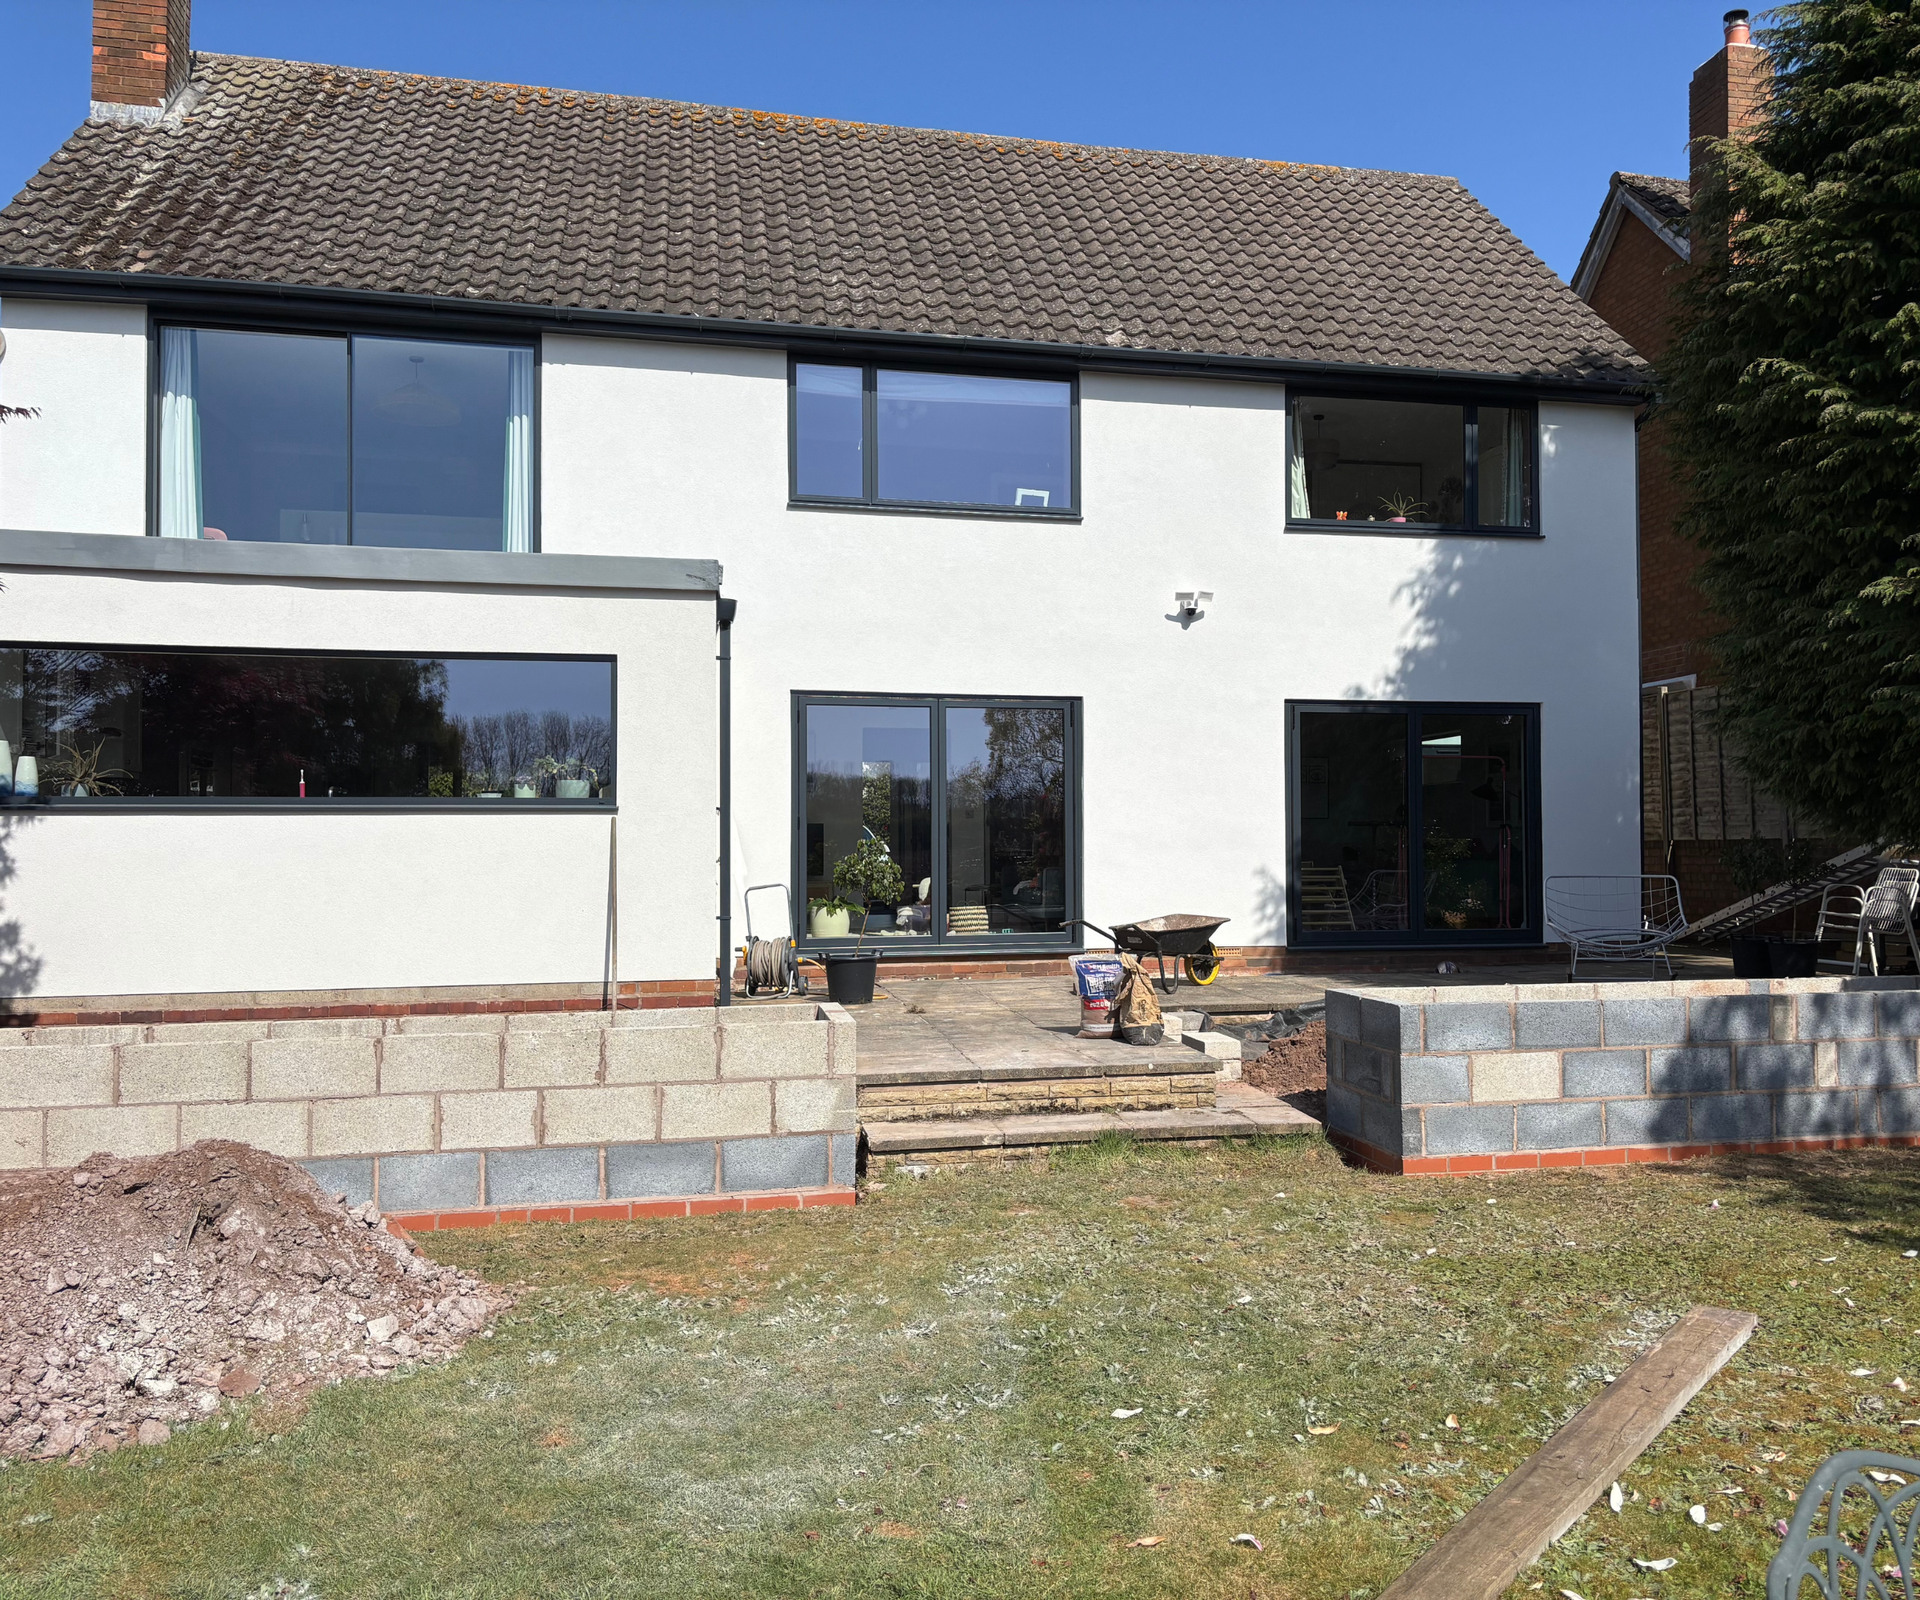
Work began by digging down to create two raised beds. The builders constructed them from breeze blocks, filled the base with MOT to halfway, then added topsoil and compost on top. The walls were finished in monocouche render to match the house. Because the colour pigment runs through the full depth of this type of render, it doesn't need painting later, which saved a job the owners were glad to skip.
2. Building the sub-frame
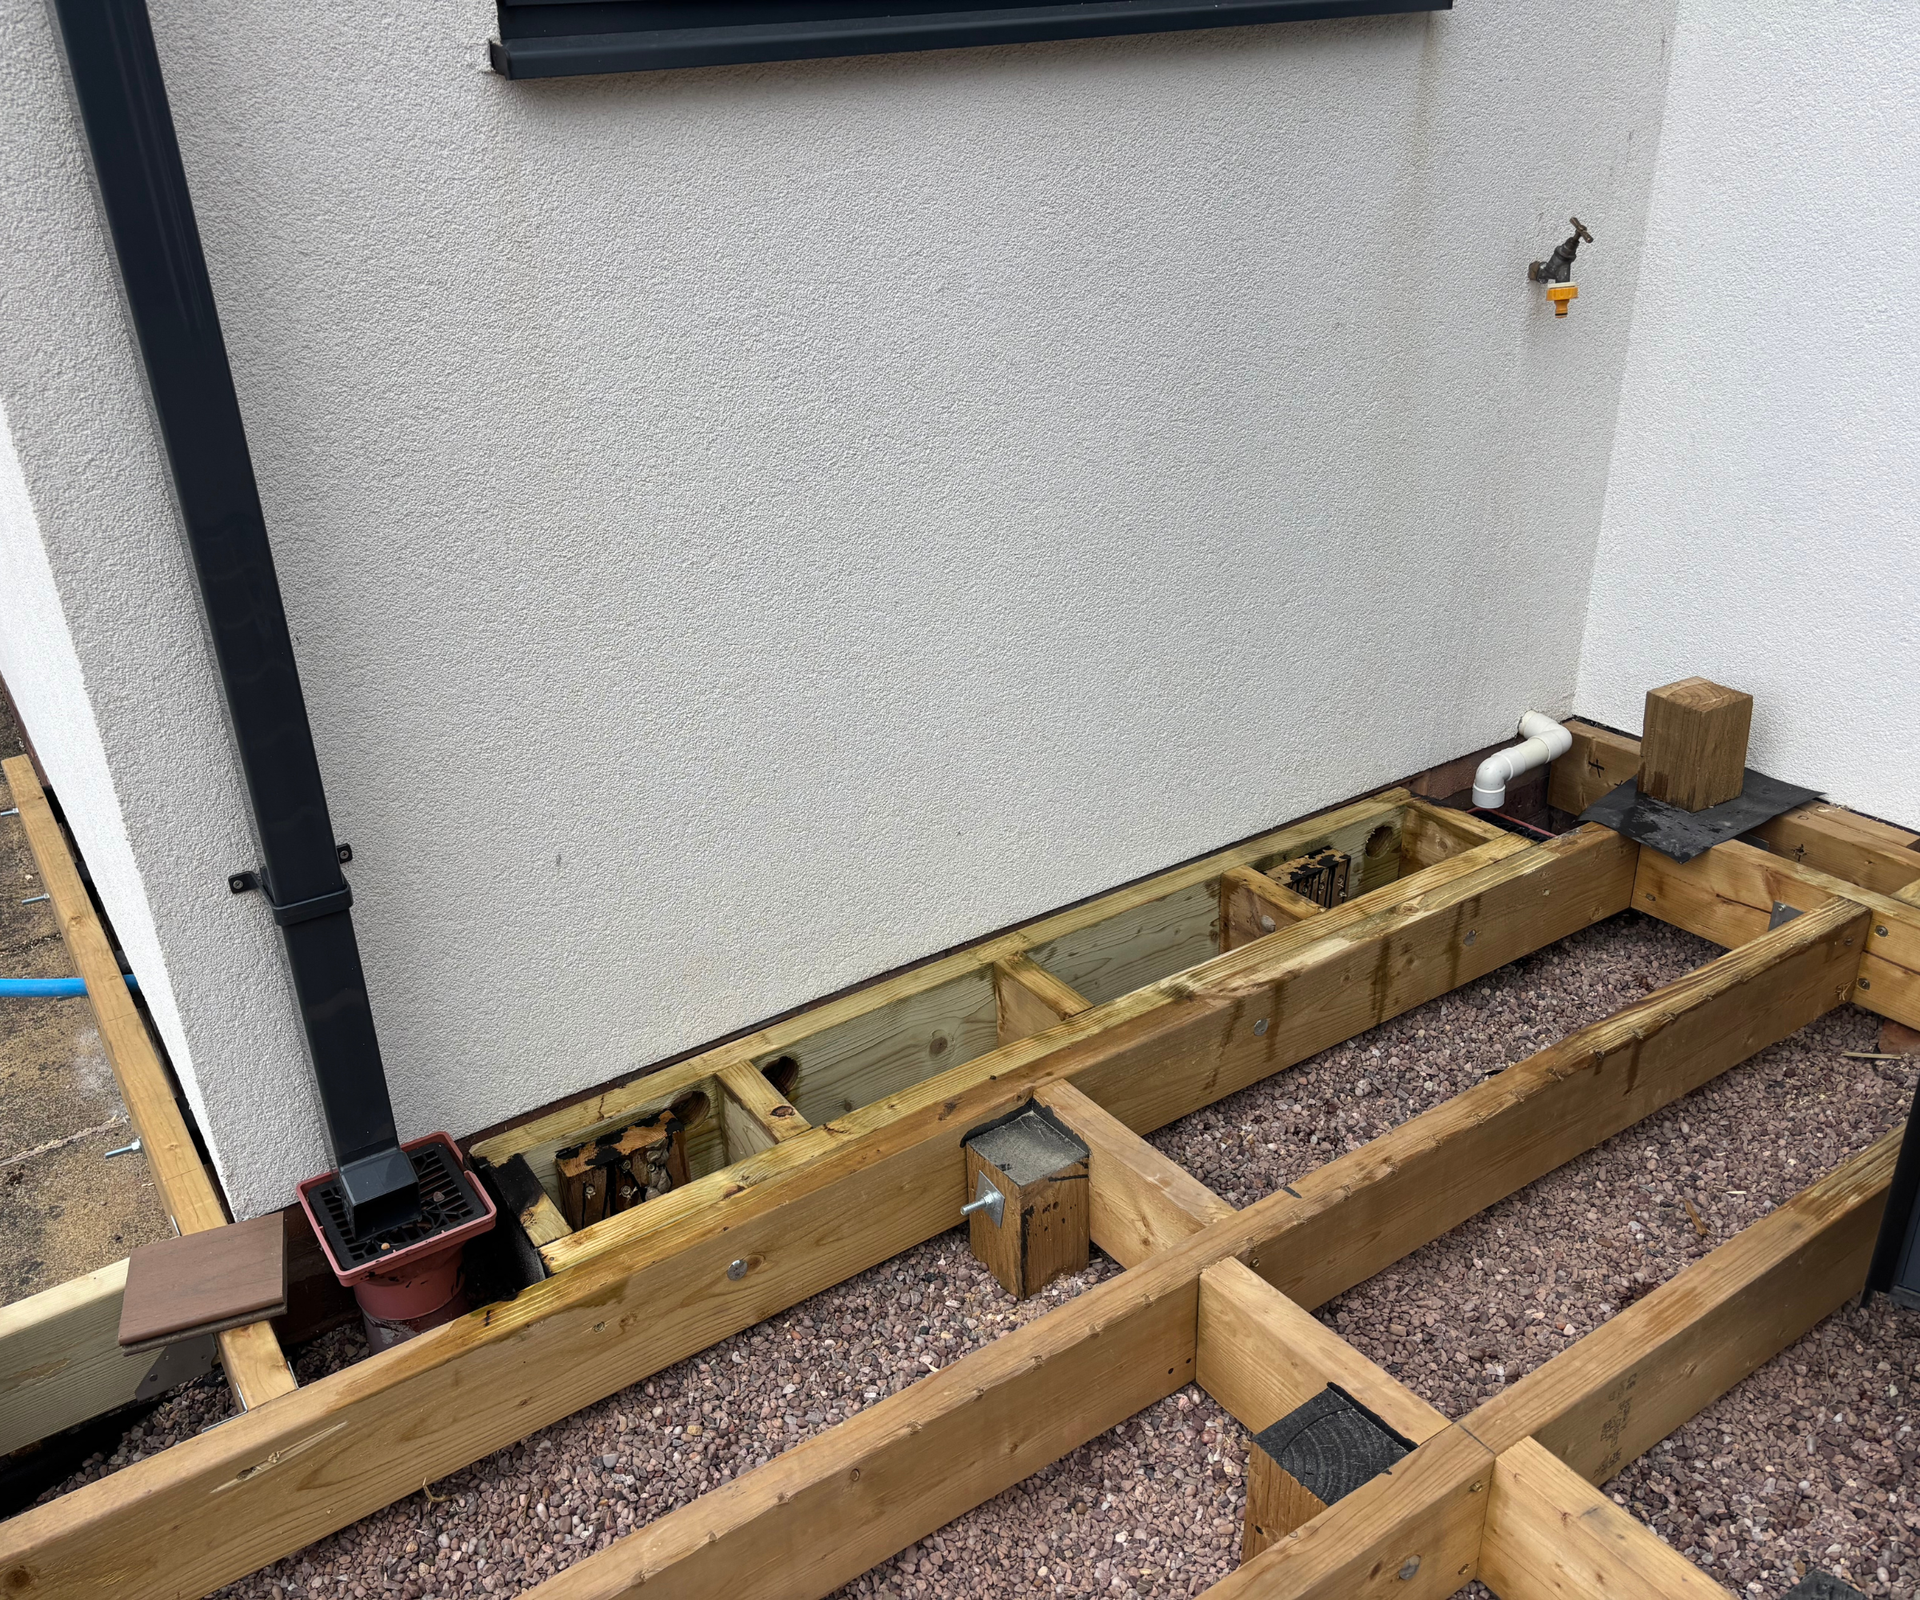
The sub-frame came next, built from timber to Trex's installation guidelines. Spacing and support positions matter here. Get them wrong and the warranty on the decking itself can be invalidated, so this was the phase that ate the most time. Levels were just as unforgiving. The team's rule was to measure twice and cut once, which kept waste down and stopped small errors compounding across the frame.
Weeds were the next concern. The old patio was covered with weed-proof membrane, and pea gravel went down on top to fill the gaps between frame sections.
3. Protecting the frame
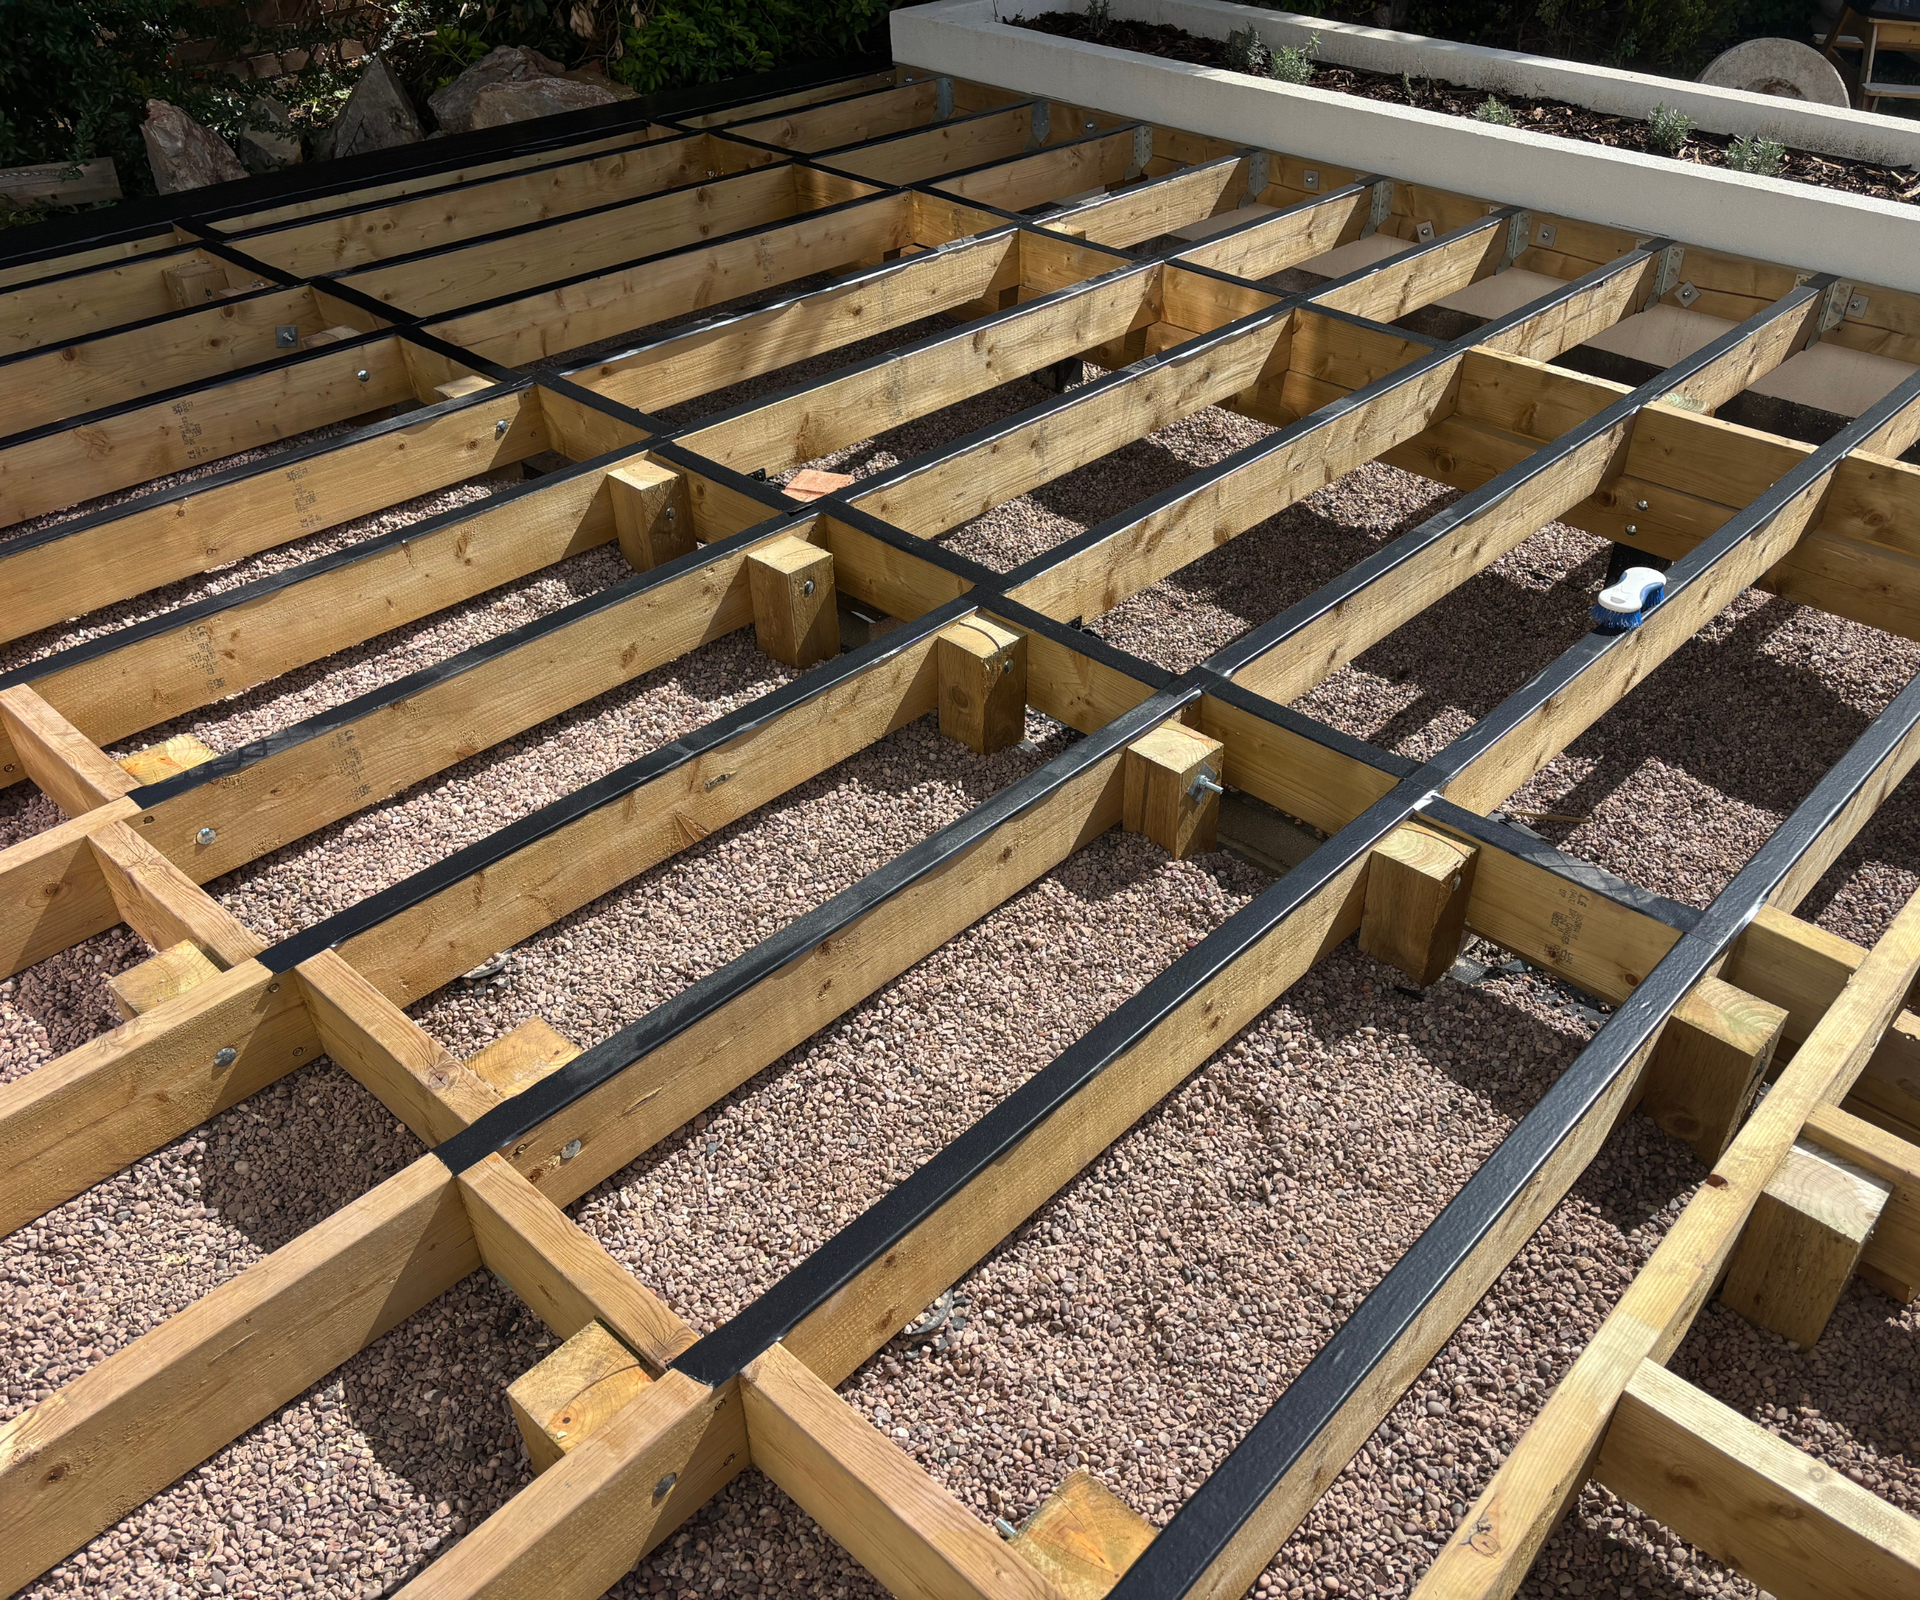
Once the frame was in place, the top surfaces received waterproof decking tape from Trex. It's a self-adhesive black tape that shields the timber from moisture and rot. It added time, but it means the deck sits on a base that's protected from the start rather than one that relies on luck.
4. Setting out the decking pattern
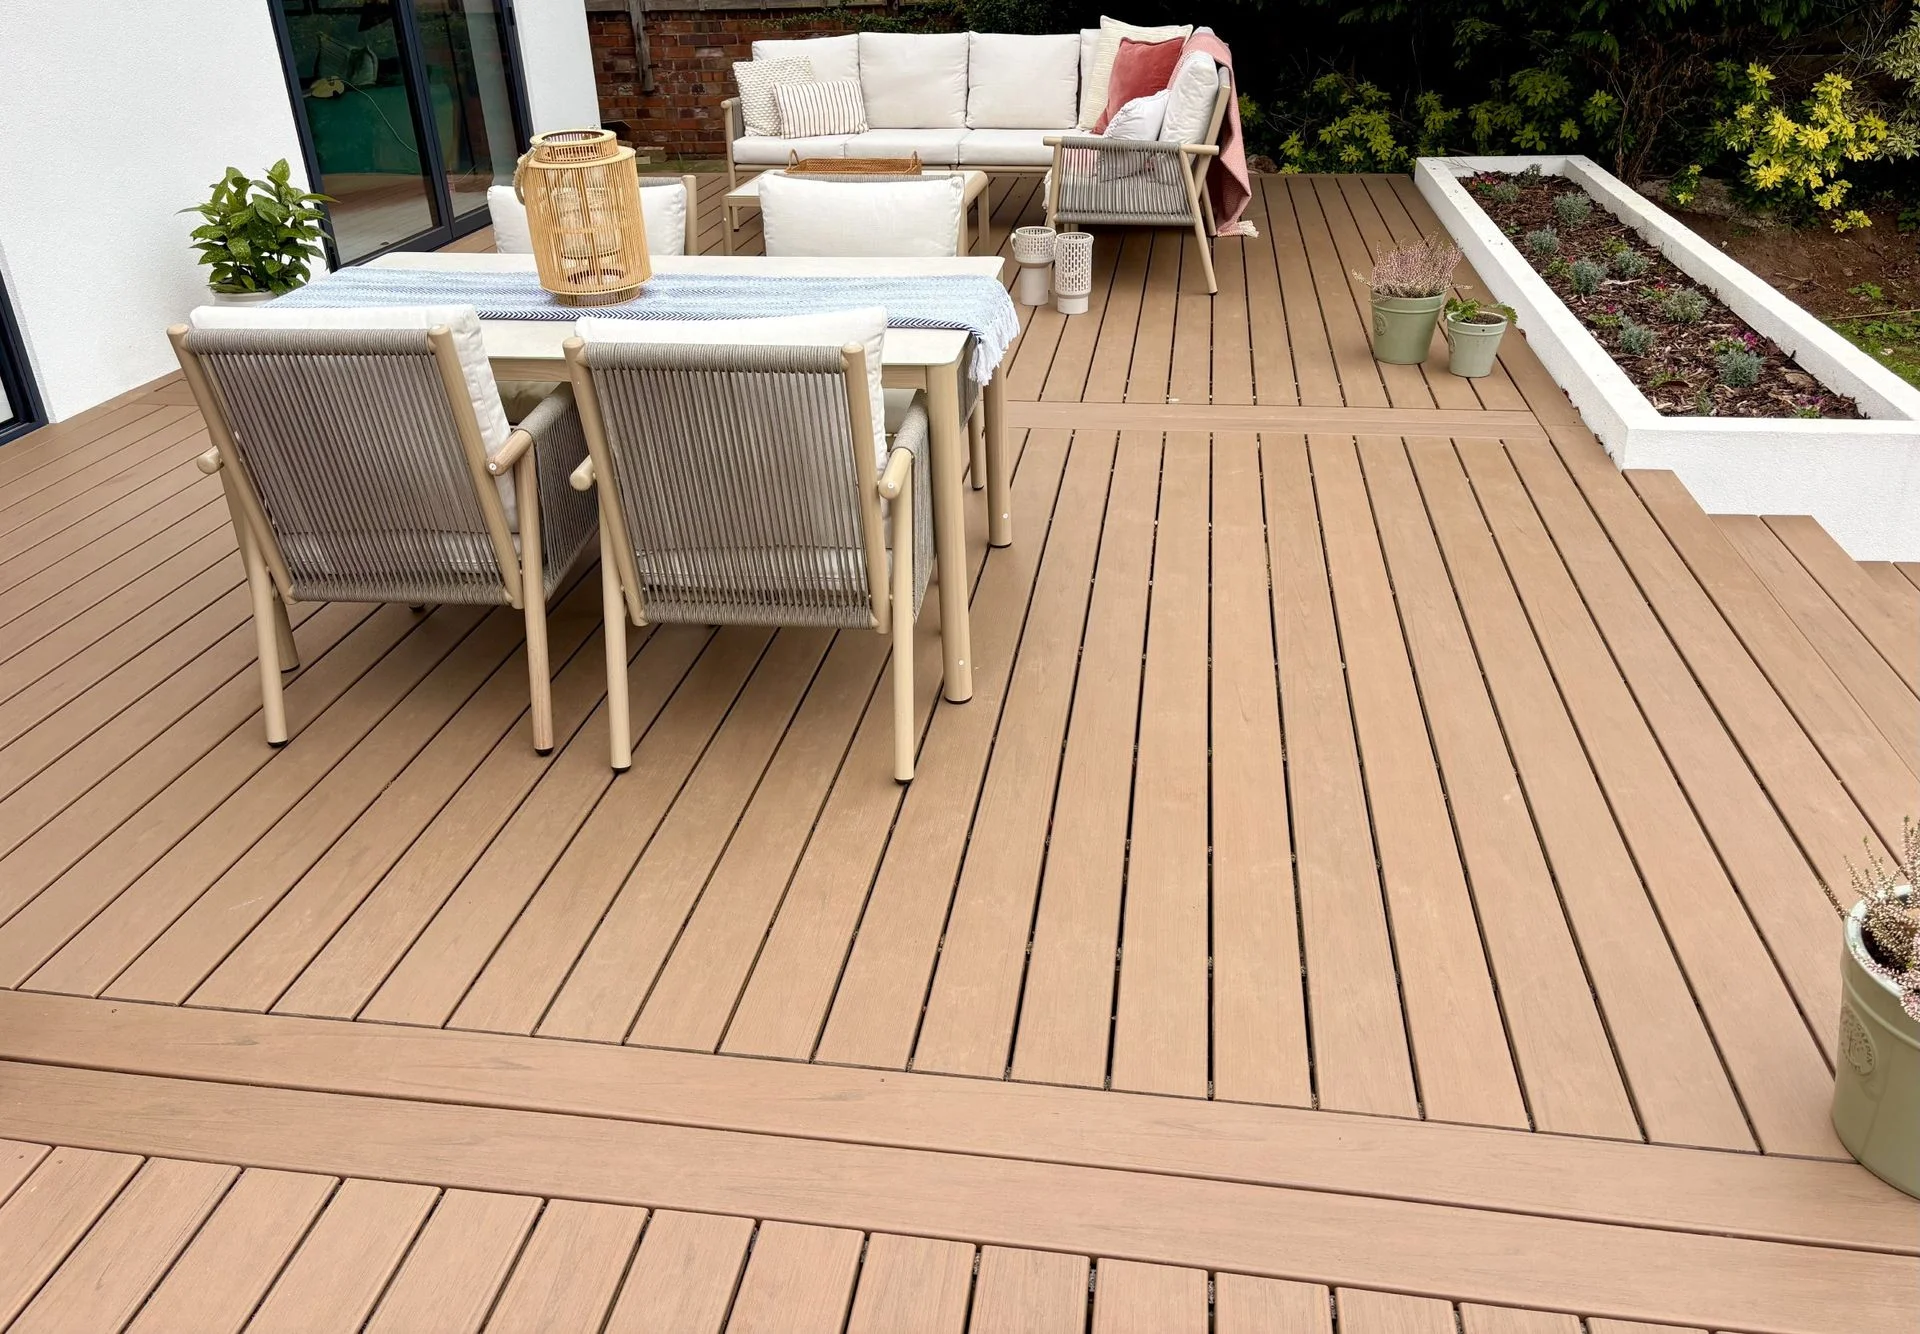
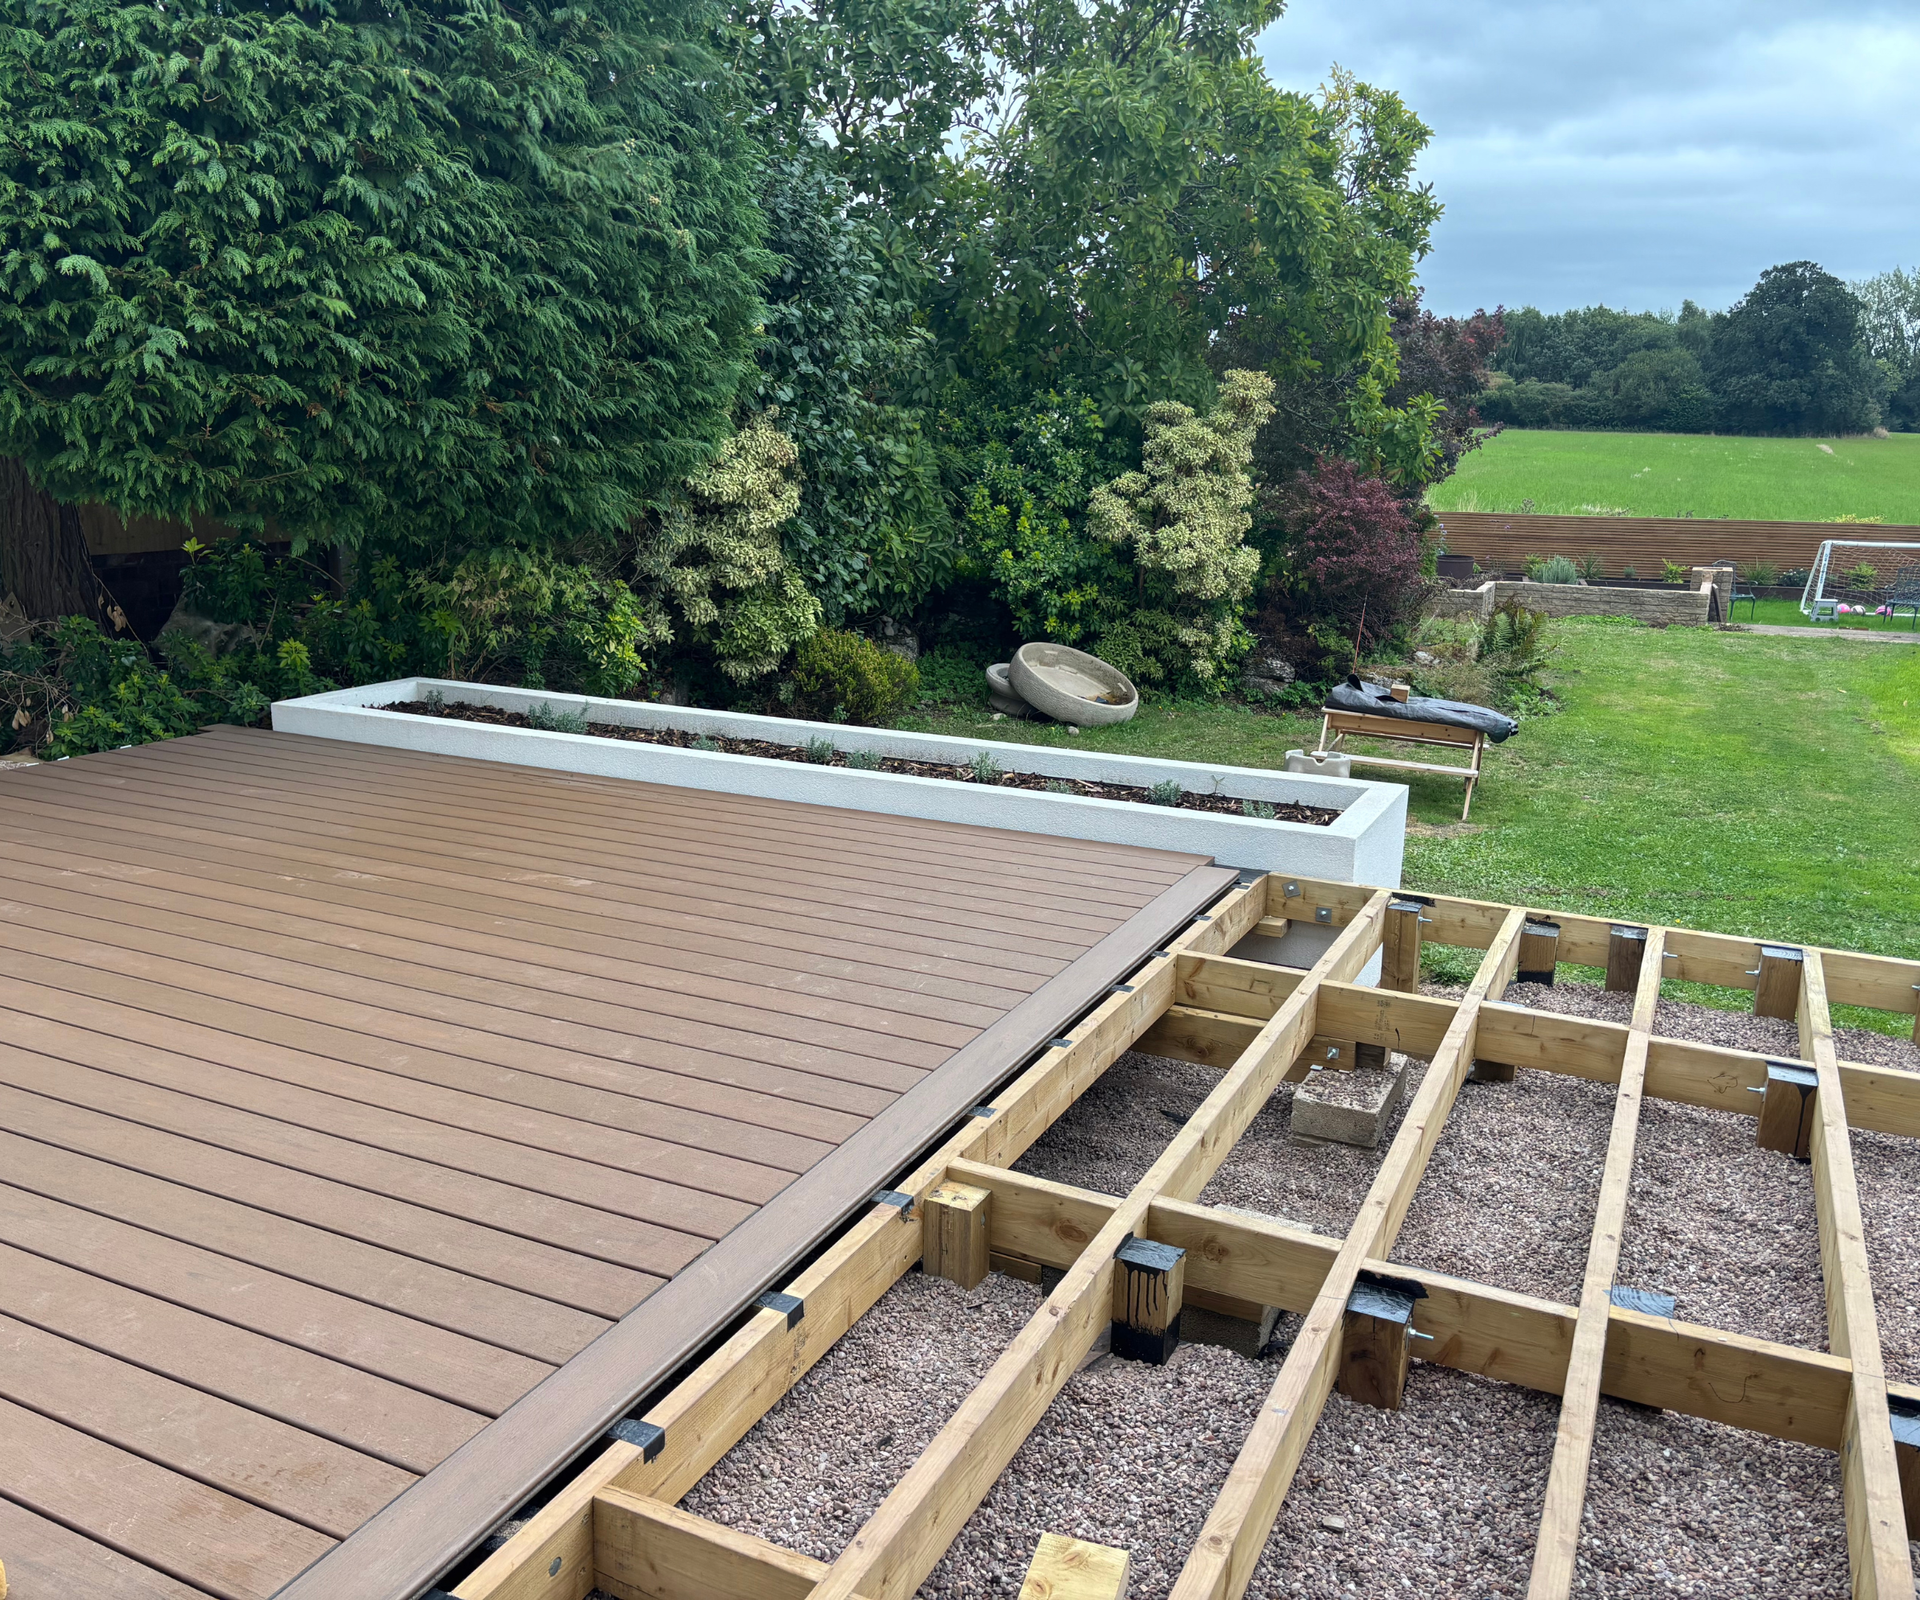
Before fixing anything, the layout was mapped out using the Trex visualiser tool, with the aim of keeping joins to a minimum. Long, uncut boards were the priority, since they make a garden look planned rather than assembled. The deck was split into three zones by two planks laid in a different direction. Those lines mark out separate areas for sitting, dining and play, and they do it without a single wall or partition.
Why composite over timber
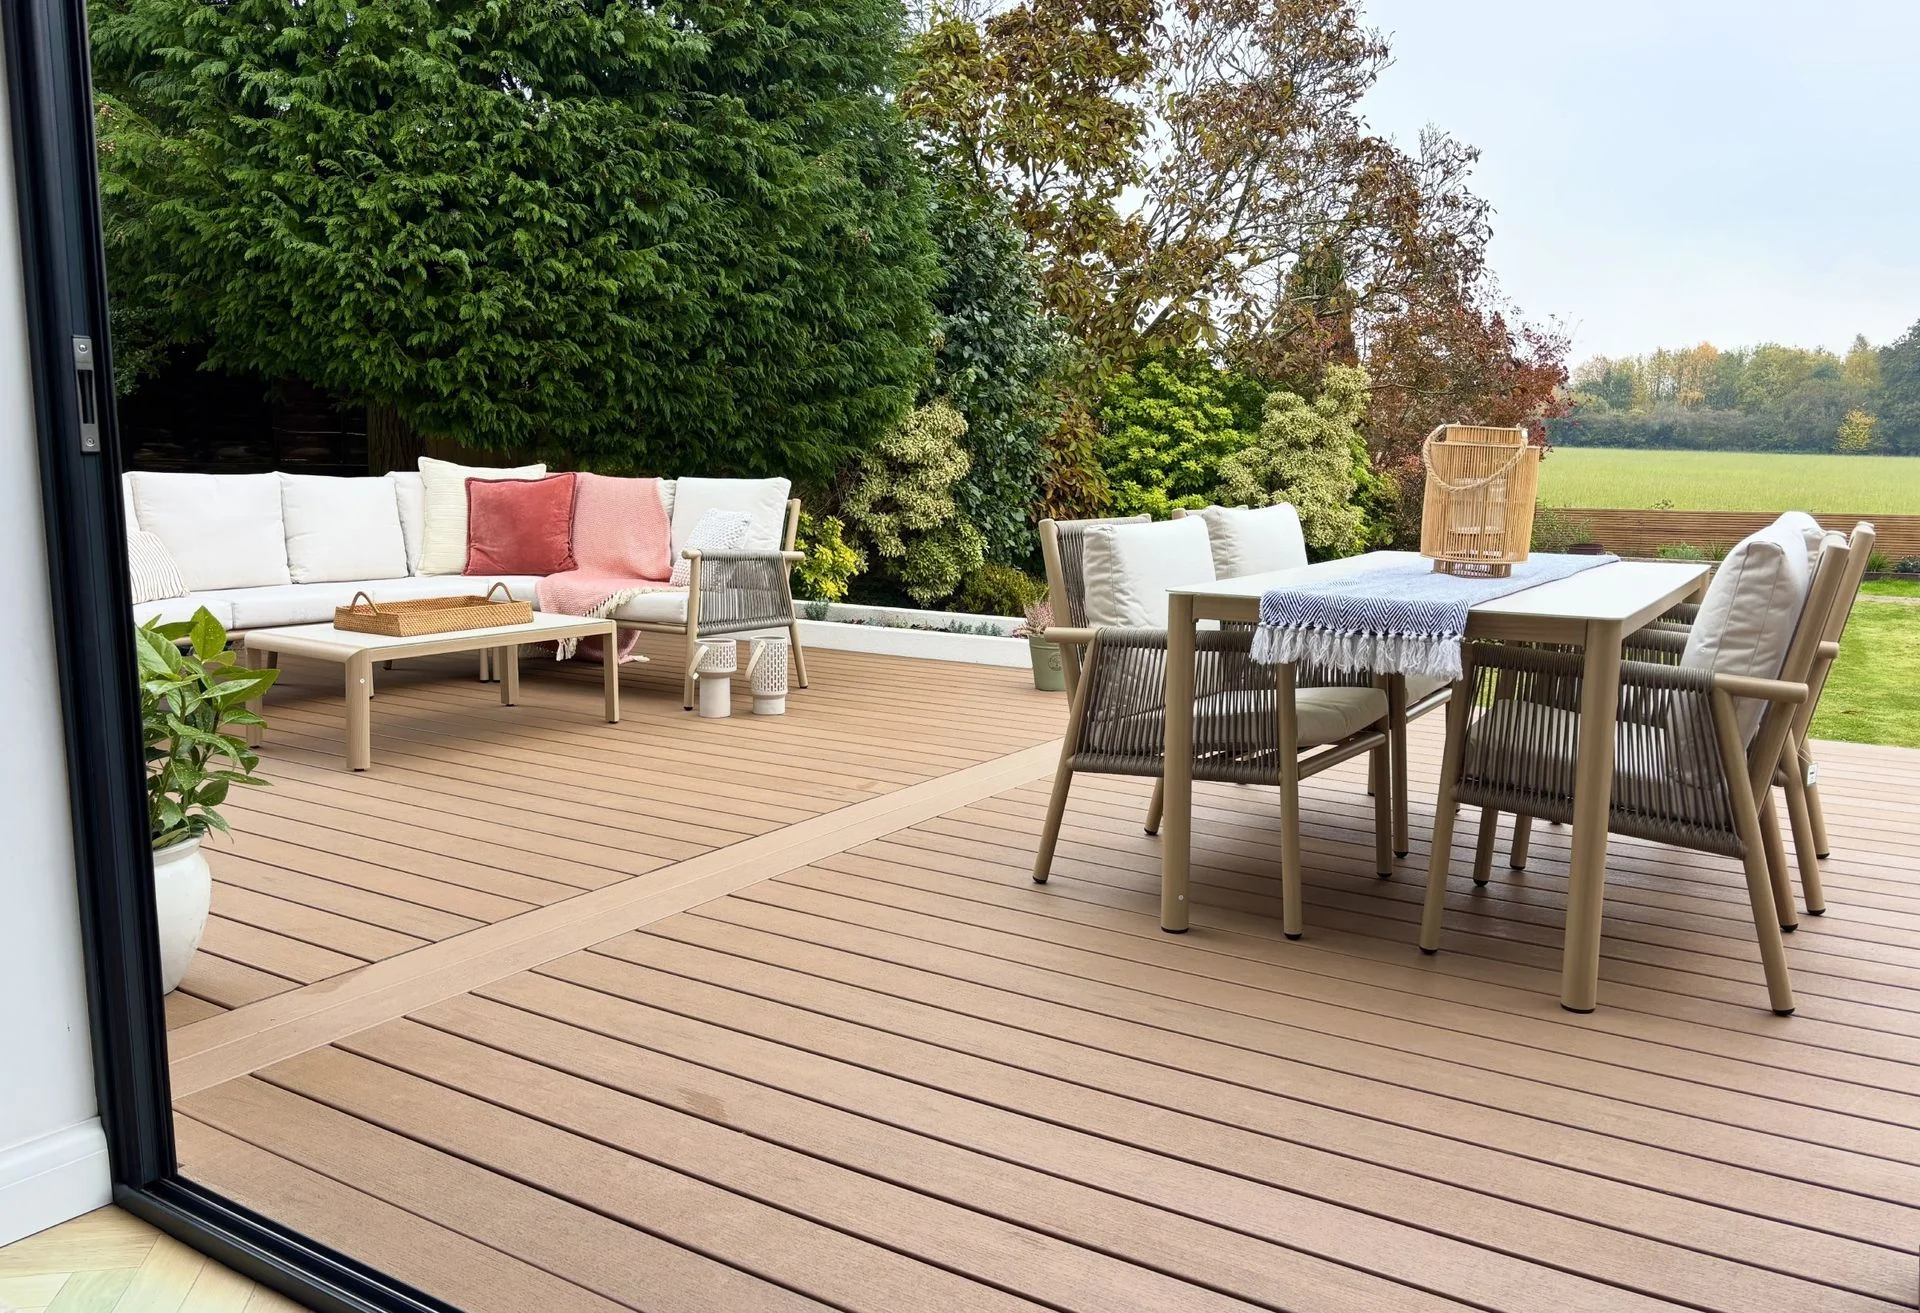
The Trex range was chosen partly for its fixings. Hidden screws sit in the gaps between boards, so the surface shows almost no fastener holes. The finish reads as continuous, which matters when the deck runs straight into a kitchen-style interior.
The cost comparison took a long time. Initial price, sustainability and long-term upkeep were all weighed against each other. Trex is made with 95% reclaimed and recycled materials and carries a 50-year warranty, which tipped the balance against real wood. Composite costs more up front. The owners' bet is that they'll make it back in reduced maintenance over the life of the deck.
Colour was the other decision. The render had to be replaced after storm damage to the brickwork, and the owners disliked how cold the new finish looked. They wanted warmth at the back of the house, so they ordered samples and used the online visualiser to settle on the Trex Lineage range in Jasper. It's close in tone to the cedar cladding on the front of the property, which ties the two elevations together.
Upkeep is simple. A brush and a mop with soapy water handles routine cleaning, and a separate mop head kept for outdoor use keeps the surface looking fresh. A wipe-down every couple of weeks is enough. Trex guarantees the boards to resist stains and fading, which mattered on a south-facing garden that gets plenty of sun. Those guarantees are the main reason the owners felt confident about the investment.
Should you build it yourself?
Not if you can avoid it. The build took close to four months from sub-frame to final boards. The owner's husband, by her own account, ranks among the more capable DIY-ers she knows, with the tools and attention to detail to match. Even he reached for the circular saw in frustration more than once.
The difficulty is that a deck leaves no room for error. Every angle has to be cut correctly, every gap has to be even, and every join has to sit neatly against its neighbour. The Trex boards cut much like real timber, and they avoid the splinters, warping and cracking that come with wood. Skill still matters, though, and the margin for mistakes is thin.
If they were starting again, the owners would hire a local TrexPro installer. Using one keeps the warranty valid and generally means a faster, less stressful installation. The finished deck has won them over: it looks and feels like real wood and needs very little maintenance. They're still glad they did the groundwork themselves, but they wouldn't repeat the installation.
For anyone planning a similar project, the practical lesson is to check level and threshold height before anything else. A door that opens onto a drop is a design problem, and a floating deck can solve it without the cost of rebuilding a patio. Get the frame right, protect it properly, and the surface will last for years with minimal effort.



Discussion
Sign in to join the discussion.